Shower Tile Labor Costs: What to Expect Per Square Foot

Understanding Shower Tile Labor Cost Per Square Foot

When planning a bathroom renovation, knowing the shower tile labor cost per square foot is crucial for budgeting. Generally, labor costs range from $2 to $16 per square foot. Several factors, including tile type and installation complexity, impact this price range.

Key Points:
– Average labor cost: $2 – $16 per square foot
– Higher costs for difficult patterns and natural stone tiles
– Professionals waste less material, potentially saving costs

Tiling your shower professionally can improve both functionality and aesthetics, adding value to your home. However, the labor cost varies widely due to factors like tile type and pattern complexity. For accurate pricing, obtaining multiple estimates from skilled installers is recommended.

I’m Nick Cincotti, owner of Cincotti Tile. With over two decades in the tile installation industry, I understand the intricacies of calculating shower tile labor cost per square foot. My team’s expertise ensures high-quality results that meet your expectations without breaking the bank.
Labor Cost Breakdown for Shower Tile Installation - shower tile labor cost per square foot infographic infographic-line-5-steps-blues-accent_colors

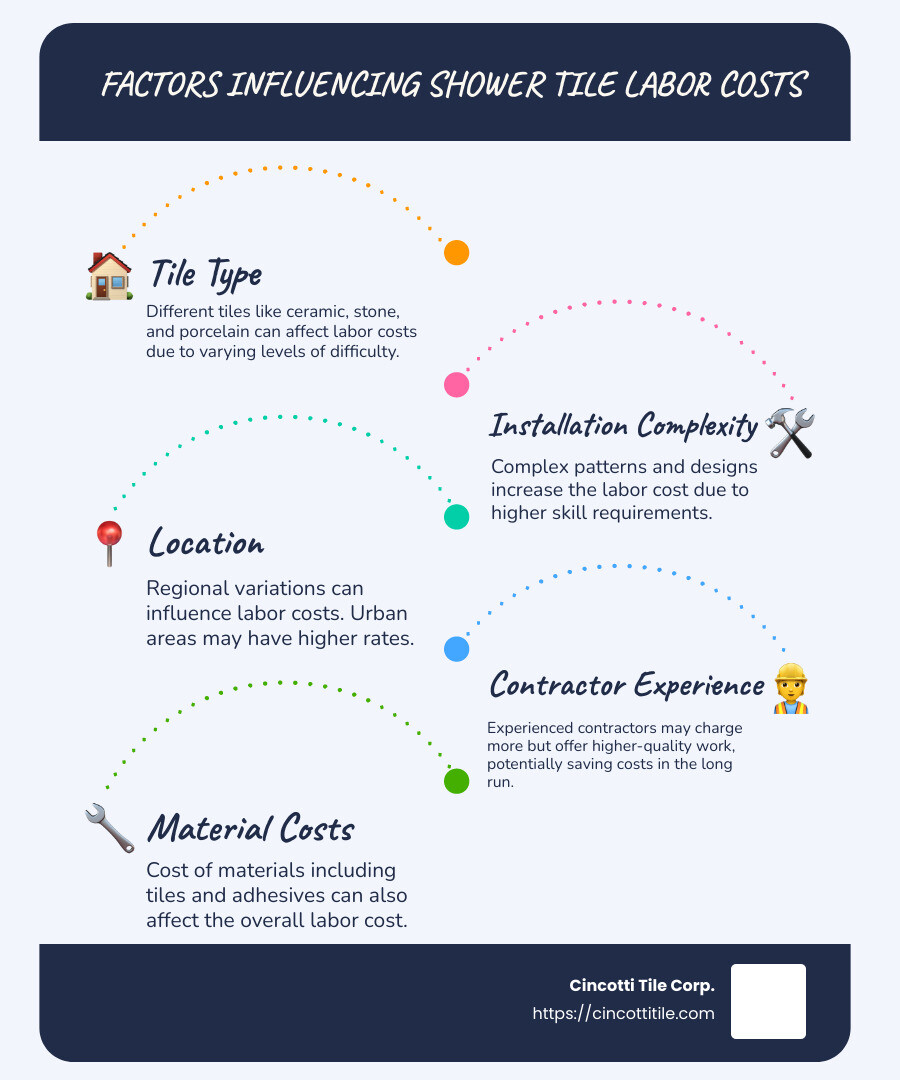
Factors Influencing Shower Tile Labor Costs

When budgeting for a shower tile installation, understand the factors that influence shower tile labor cost per square foot. Here are the key elements that can affect the final price:

Tile Type

The type of tile you choose plays a significant role in labor costs. Ceramic tiles are generally more affordable to install, while natural stone tiles and mosaics can be more expensive due to their complexity and the need for special handling.

  • Ceramic Tile: Easier to cut and install, leading to lower labor costs.
  • Natural Stone Tile: Requires precise cutting and sealing, increasing labor costs.
  • Mosaic Tile: Small pieces and intricate designs demand more time and skill, raising the price.

Installation Complexity

The complexity of the tile pattern and the layout can also impact labor costs. Simple, straightforward designs are quicker and less costly to install, while intricate patterns require more time and skill.

  • Straight Lay Patterns: Easier to install and less time-consuming.
  • Diagonal or Herringbone Patterns: More complex and time-consuming, increasing labor costs.

Location

Geographic location can influence labor costs due to regional variations in labor rates and cost of living. For example, labor costs in urban areas or regions with a higher cost of living may be more expensive than in rural areas.

  • Urban Areas: Typically have higher labor costs.
  • Rural Areas: Generally lower labor costs.

Contractor Experience

The experience and reputation of the contractor can also affect labor costs. Highly skilled and reputable contractors may charge more for their expertise, but they often provide higher quality work and waste less material, potentially saving you money in the long run.

  • Experienced Contractors: Higher rates but often better quality and efficiency.
  • Less Experienced Contractors: Lower rates but may take longer and have higher material waste.

By understanding these factors, you can better estimate the shower tile labor cost per square foot for your project and make informed decisions. Obtaining multiple estimates from skilled installers can help ensure you get a fair price and high-quality results.

Average Labor Costs for Shower Tile Installation

When planning a shower tile project, labor costs are a major consideration. On average, you can expect to pay between $7 and $14 per square foot for labor. However, most installations will fall within the $8 to $10 per square foot range.

Regional Variations

Labor costs can vary significantly based on your geographic location:

  • Urban Areas: Typically, labor costs are higher due to the increased cost of living and demand for skilled labor.
  • Rural Areas: Generally, you can expect lower labor costs because of a lower cost of living and less competition for skilled labor.

For instance, a shower tile installation in New York City might be on the higher end of the spectrum, while a similar project in a rural area of the Midwest could be more affordable.

Understanding these variations can help you budget more accurately for your specific location.

Regional Labor Cost Variations - shower tile labor cost per square foot

By knowing what to expect, you can better plan your budget and ensure your project stays on track. Next, we’ll break down the costs in more detail to give you a clearer picture of what you’re paying for.

Detailed Breakdown of Costs

Understanding the breakdown of costs for a shower tile installation can help you budget effectively. Let’s explore the different components:

Material Costs

The type of tile you choose significantly impacts the overall cost. Here’s a quick overview of average prices per square foot for various materials:

  • Ceramic Tile: $2 – $50
  • Porcelain Tile: $3 – $35
  • Travertine Tile: $5 – $30
  • Slate Tile: $7 – $20
  • Limestone Tile: $6 – $17
  • Granite Tile: $3 – $10
  • Marble Tile: $8 – $50
  • Glass Tile: $7 – $30

These prices are for the material only and do not include installation costs.

Labor Costs

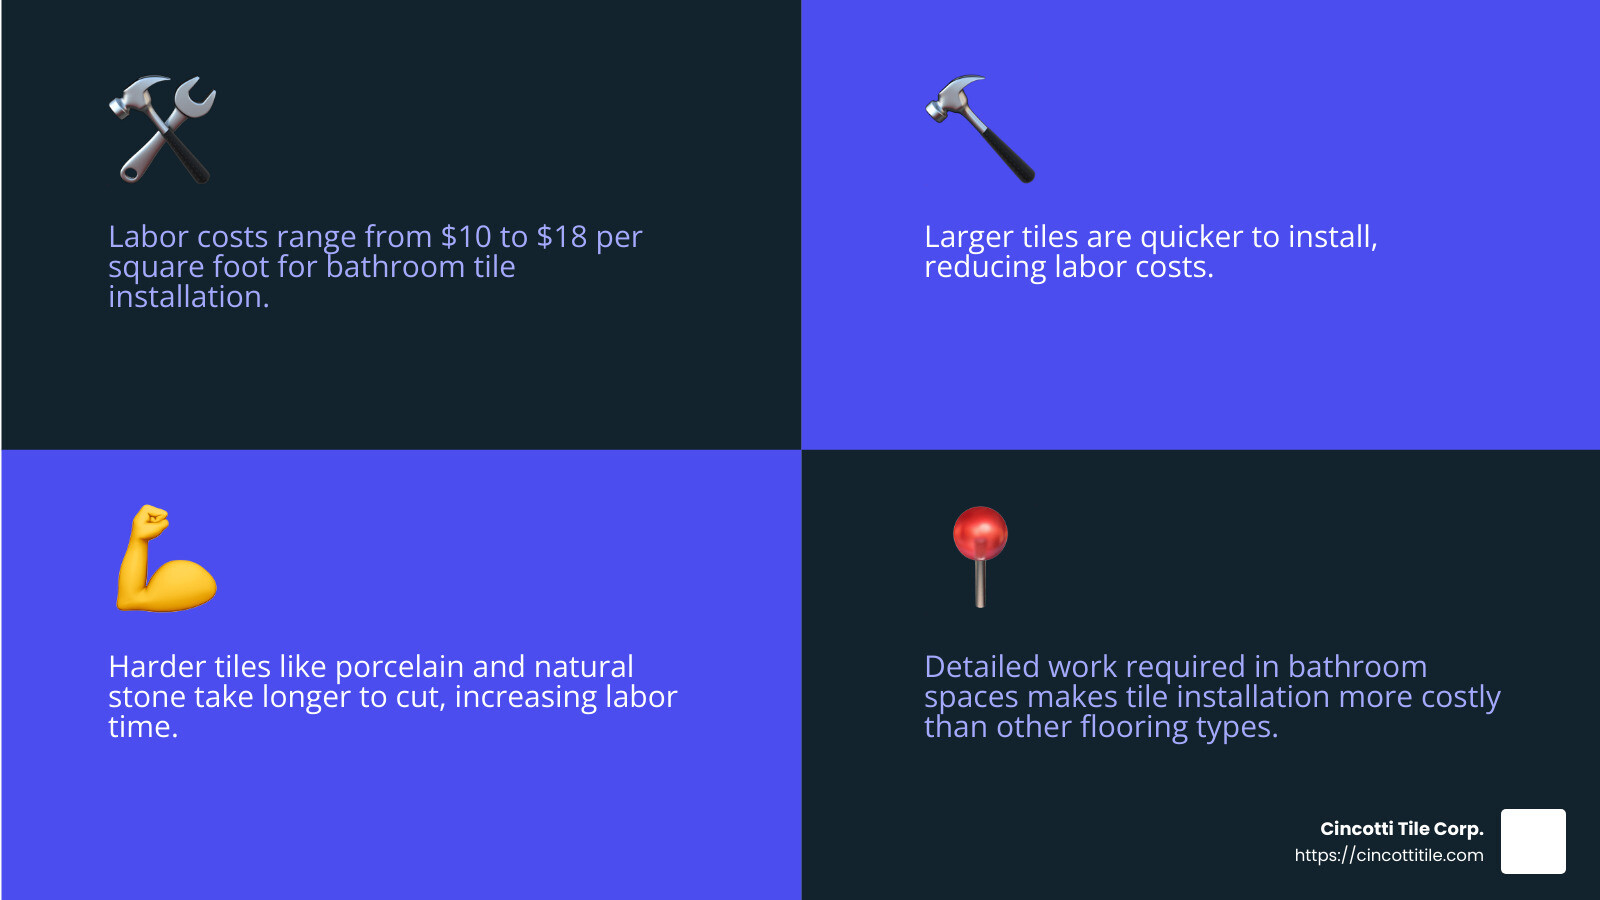
As mentioned earlier, labor costs range from $7 to $14 per square foot, with most installations falling between $8 and $10 per square foot. Factors influencing these costs include:

  • Tile Type: More intricate tiles like mosaics or natural stone require more skill and time, increasing labor costs.
  • Installation Complexity: Patterns and layouts like herringbone or diagonal setups also add to labor time and cost.
  • Location: Labor costs vary by region, with urban areas typically being more expensive.

Additional Expenses

Beyond material and labor, there are other costs to consider:

  • Backer Board: Essential for waterproofing, costing around $1.50 to $2 per square foot.
  • Waterproof Membrane: Adding an extra layer of protection, costing around $1 to $2 per square foot.
  • Grout and Sealant: Necessary for finishing, typically costing $0.50 to $1 per square foot.

Equipment Rental

Specialized equipment is often required for tile installation. If you’re considering a DIY approach or if your contractor doesn’t include these in their quote, equipment rental costs can add up:

  • Tile Saw: $50 – $100 per day
  • Mortar Mixer: $30 – $60 per day

These tools ensure the job is done efficiently and correctly, contributing to the overall cost.

By breaking down these costs, you can see how each element contributes to the total price of your shower tile installation. Next, we’ll look at how these costs vary by tile type to help you make an informed decision.

Cost Comparison by Tile Type

When planning a shower tile installation, the type of tile you choose can significantly impact your budget. Let’s compare the costs for different types of tiles, including ceramic, stone, porcelain, and mosaic.

Ceramic Tile

Ceramic tiles are a popular choice due to their affordability and versatility. They range from $2 to $50 per square foot for materials alone.

  • Labor Costs: Installing ceramic tiles typically costs between $7 and $14 per square foot. Ceramic is relatively easy to work with, making labor costs lower compared to more intricate tiles.
  • Pros: Durable, easy to clean, and available in various styles and colors.
  • Cons: Can be slippery when wet unless treated with a non-slip finish.

Stone Tile

Stone tiles, such as travertine, slate, and marble, offer a natural, luxurious look but come with higher costs and maintenance.

  • Travertine: Costs about $2 to $30 per square foot. It’s recommended to seal it regularly to prevent staining.
  • Slate: Priced at $4 to $10 per square foot. Slate is durable and comes in various colors but may require additional labor costs for installation.
  • Marble: One of the most expensive options, ranging from $8 to $50 per square foot. Marble requires sealing to prevent rust and staining.

  • Labor Costs: Stone tiles generally cost more to install, often falling between $10 and $20 per square foot due to their weight and the skill required.

  • Pros: High-end appearance, adds value to your home.
  • Cons: Higher material and labor costs, requires regular sealing and maintenance.

Porcelain Tile

Porcelain tiles are a type of ceramic tile that is denser and more durable, making them ideal for wet areas like showers.

  • Material Costs: Ranges from $4 to $30 per square foot.
  • Labor Costs: Typically falls between $8 and $12 per square foot. Porcelain can mimic the look of more expensive materials like marble or wood, offering a high-end look at a lower cost.
  • Pros: Low water absorption rate, highly durable, and versatile in design.
  • Cons: Can be more challenging to cut and install, potentially increasing labor costs.

Mosaic Tile

Mosaic tiles are small tiles often used to create intricate patterns and designs. They can be made from various materials, including glass, ceramic, and stone.

  • Material Costs: Generally range from $10 to $40 per square foot.
  • Labor Costs: Due to the complexity of installation, labor costs can be higher, typically between $12 and $20 per square foot.
  • Pros: Highly customizable, excellent for creating unique designs.
  • Cons: Higher labor costs due to the intricate installation process, some glass mosaics may not be suitable for floors due to sharp edges.

By comparing these costs, you can better understand how your choice of tile will impact your overall budget. Next, we’ll address some frequently asked questions about shower tile labor costs to further guide your decision-making process.

Frequently Asked Questions about Shower Tile Labor Costs

What is the average labor cost to tile a shower?

The average labor cost to tile a shower typically ranges from $7 to $14 per square foot. This variation depends on factors like the complexity of the installation, the type of tile, and the contractor’s experience. For instance, installing stone tiles like marble or slate can be more labor-intensive, often falling on the higher end of the range due to their weight and the skill required. Additionally, stone tiles usually need sealing to prevent staining and damage, adding to the overall cost.

How much does it cost to install 100 sq ft of tile?

Installing 100 square feet of tile can cost between $800 and $4,400, depending on the tile type and labor rates. This estimate includes both material and labor costs. For example:

  • Ceramic tiles are more affordable, with material costs ranging from $2 to $50 per square foot and labor costs between $7 and $14 per square foot.
  • Stone tiles, such as travertine or marble, are pricier. The material costs range from $2 to $50 per square foot and labor costs can be $10 to $20 per square foot.

The final cost will depend on the specific choices you make regarding tile type and any additional features like intricate designs or custom layouts.

How much is labor for wall tile installation?

Labor for wall tile installation typically costs between $3 and $15 per square foot. This wide range is due to several factors:

  • Tile Type: Simple ceramic tiles are easier and cheaper to install compared to intricate mosaic or heavy stone tiles.
  • Hourly Rates: Some contractors charge hourly rates, which can be around $55 to $78 per hour, depending on their expertise and location.
  • Complexity: More complex patterns or layouts, like herringbone or diagonal designs, can increase labor costs due to the additional time and precision required.

By understanding these factors, you can better estimate your shower tile labor costs and make informed decisions about your project. Next, we’ll look at the detailed breakdown of costs involved in a shower tile installation.

Conclusion

In summary, the cost to tile a shower varies greatly based on several factors, including the type of tile used, the complexity of the installation, and the contractor’s experience. Labor costs typically range from $7 to $14 per square foot, but this can increase if you’re opting for more intricate designs or high-end materials like marble or slate.

When it comes to choosing a contractor, experience and craftsmanship matter. That’s where we, at Cincotti Tile Corp., excel. With over 20 years of experience, we provide exceptional craftsmanship and competitive pricing for all your tile installation needs. Our meticulous attention to detail ensures that every tile is perfectly aligned, resulting in a flawless, professional finish.

We understand that every project is unique, and we guide you through every step of the process—from the initial consultation to the final walkthrough. Our commitment to customer satisfaction and our extensive expertise make us the go-to choice for homeowners in Billerica, MA, and surrounding areas.

If you’re considering a bathroom renovation or new construction, your dream bathroom is only a tile away with Cincotti Tile Corp. Request Your Free Tile Installation Estimate Today!

For all your residential and commercial tile installation needs, we proudly serve numerous Massachusetts communities, offering both residential and commercial tile installation services in: Andover, Arlington, Bedford, Belmont, Beverly, Billerica, Burlington, Carlisle, Concord, Danvers, Lexington, Lincoln, Lynnfield, Malden, Medford, Melrose, Middleton, North Andover, North Reading, Peabody, Reading, Stoneham, Tewksbury, Wakefield, Wellesley, Weston, Wilmington, Winchester, and Woburn.

Bathroom Tiling: The Best Products and Where to Buy Them

Why Bathroom Tiling is Important

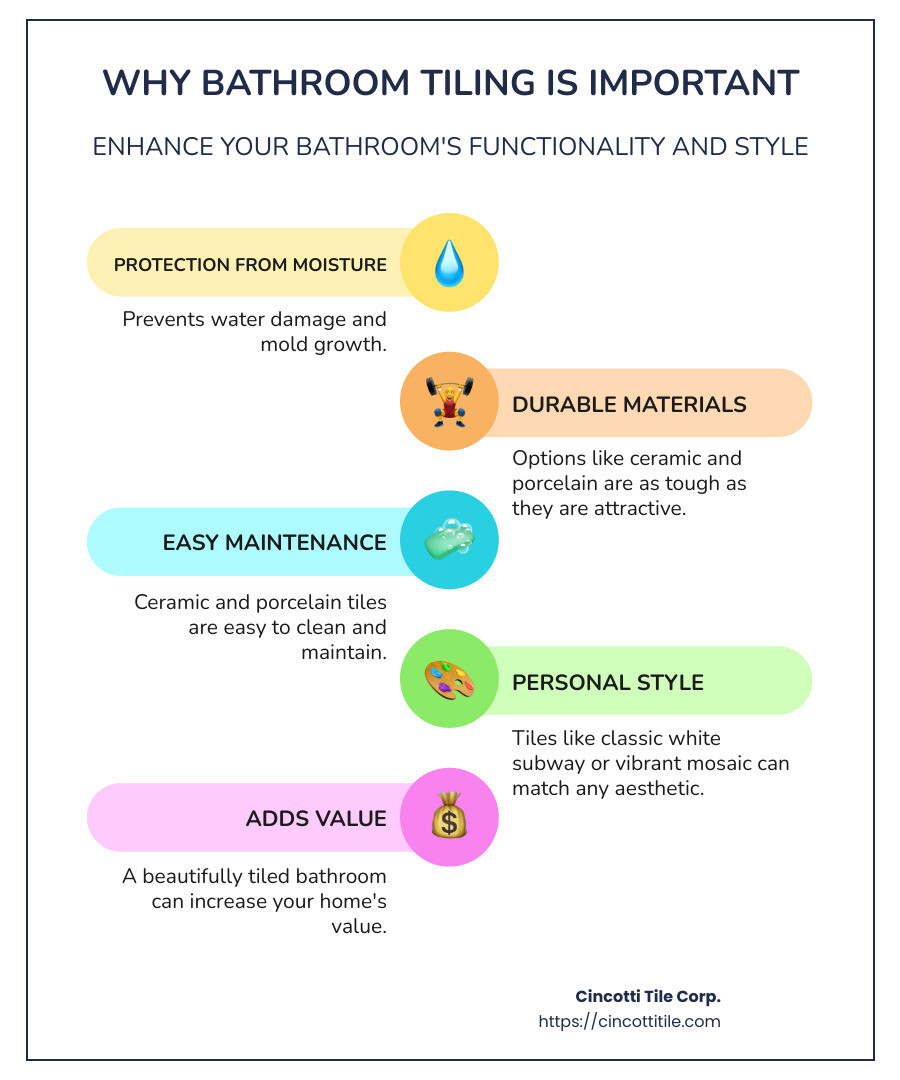
Bathroom tiling is where fashion meets function. It’s more than just a design choice; it’s essential for protecting your walls, floors, and shower from moisture. Well-chosen tiles can transform a plain bathroom into a personal spa that reflects your unique style.

If you’re looking to lift your bathroom, here’s a quick overview:

  • Protection from Moisture: Prevents water damage and mold growth.
  • Durable Materials: Options like ceramic and porcelain are as tough as they are attractive.
  • Personal Style: From classic white subway to vibrant mosaic, tiles can match any aesthetic.

At Cincotti Tile Corp., we specialize in creating beautiful, durable tiled bathrooms. Our expert team ensures your project adds value and comfort to your home, custom exactly to your taste.

Benefits of Bathroom Tiling - bathroom tiling infographic infographic-line-5-steps-colors

Bathroom tiling vocab explained:
– bathroom tile installation
– replacing bathroom tile floor cost

Choosing the Perfect Tiles for Your Bathroom

Style Your Bath Your Way

Bathroom tiles are not just functional; they are a canvas for your personality. Whether you’re upgrading your primary bath or designing a cozy powder room, the right tiles can create a relaxing atmosphere that suits your aesthetic.

Patterned tiles add color and interest to your walls and floors. For instance, mosaic tiles are perfect for backsplashes or shower floors because their smaller format means more grout lines, which reduce slippage.

If you prefer a classic look, white subway tiles are a timeless choice. They can be styled in various ways to add subtle interest. Some of our popular options include:

  • Casablanca
  • Costa Emerald Mix
  • Artisan Tiare

Use Shape to Create Interest

The shape of your tiles can significantly impact the overall look of your bathroom. Combining different shapes can create a cohesive and designed look.

Square and herringbone patterns are classic choices, while hexagon tiles are always on trend. Pairing tiles from the same collection but in different shapes can add a unique touch.

Consider these featured tiles:

  • Zellige Alabaster
  • Victoria Grey Dark
  • Laura Ashley Louise Star Cloud Blue

Ceramic and Porcelain Tile

When it comes to durability and ease of maintenance, ceramic and porcelain tiles are top choices. These materials are not only long-lasting but also come in various styles, from lavish marble-look to intricate patterns. They are easy to clean, making them ideal for bathroom floors.

Some of our featured tiles include:

  • Hackney Pearl
  • Livingstone Nero & Alvarado
  • Nikki Chu Zulu Graphite

Whether you’re looking to create a serene spa-like primary bath or a chic powder room, our wide selection of tiles ensures you’ll find the perfect fit for your project. Explore more ideas for bathroom walls and floors on our website or visit one of our showrooms.

Bathroom Tile Installation

How to Tile Your Bathroom From Top to Bottom

Updating your bathroom with new tiles can transform an outdated space into a stylish and functional retreat. Not only is bathroom tiling visually appealing, but it’s also simple to install, customize, and clean. Here’s a guide to help you tile your bathroom from top to bottom with minimal effort.

Bathroom Tile Installation Cost

On average, it costs between $886 and $2,868 to lay bathroom tiles, including labor. The price varies depending on contractor fees, the type of tile, and the amount needed. Ceramic tiles are generally more affordable than porcelain tiles.

Cost-saving tips:
– Professional Installation: Ensure a flawless finish by hiring experienced professionals.
– Choose Ceramic: Save up to 60% per square foot by opting for ceramic over porcelain.

Basic Tile Installation Guide

Patience is key when installing tiles. Proper prep work and layout can save you from headaches later. Here are the essential tools you’ll need:

  • Wet Saw: To cut tiles precisely.
  • Tile Mortar: The adhesive that secures your tiles.
  • Notch Trowel: For spreading mortar evenly.
  • Tile Membrane: Protects your subfloor.
  • Tile Spacers: Keeps tiles evenly spaced.
  • Chalk Line: Helps align your tiles.
  • Bubble Level: Ensures your surface is flat.
  • Narrow Margin Trowel: For spreading mortar between tiles.
  • Rubber Grout Float: Fills gaps between tiles.
  • Safety Goggles and Gloves: For protection.

How to Lay Bathroom Floor Tiles

  1. Prep the Subfloor: Ensure it’s clean and flat.
  2. Spread Tile Mortar: Use a notch trowel to spread mortar across the floor.
  3. Install Tile Membrane: Lay it down in sections over the wet mortar.
  4. Make a Reference Line: Use a chalk line to keep tiles straight.
  5. Lay the Tiles: Apply another layer of mortar and lay tiles along the reference line. Use spacers to maintain consistency.
  6. Tile the Perimeter: Cut tiles with a wet saw to fit around the edges.
  7. Clean the Tiles: Wipe off excess mortar with a wet sponge.
  8. Start Grouting: Wait 24 hours before grouting. Use a rubber float to spread grout diagonally between tiles.

How to Tile a Bathroom Wall

  1. Determine the Stopping Point: Decide where you want the tile to end.
  2. Find the Center: Measure to find the center of the wall.
  3. Create a Grid: Use a chalk line to draw a grid for even placement.
  4. Use a Batten: Attach a wooden batten for a straight starting point.
  5. Apply Tile Mortar: Spread mortar in sections using a notch trowel.
  6. Install the Tiles: Start from the batten and work upwards in a diagonal pattern.
  7. Finish and Grout: Remove the batten after 12 hours, then grout the tiles after another 24 hours.

How to Install Backsplash Tile

  1. Choose Your Color and Style: Reflect your personal style.
  2. Plan Around Outlets: Avoid tiling over electrical outlets.
  3. Start at the Midway Point: Begin tiling from the middle and work outwards.
  4. Apply Tile Mortar: Spread mortar in sections with a notch trowel.
  5. Lay the Tiles: Lay tiles in a stair-like pattern, using spacers for consistency.
  6. Grout the Tiles: After 24 hours, grout the tiles to complete the look.

Bathroom Tile Installation

By following these steps, you can achieve a professional-looking tile installation that will improve the beauty and functionality of your bathroom. For more tips and ideas, check out our bathroom tiling services.

Next, let’s explore the latest trends in bathroom tiling to inspire your next project.

Top Bathroom Tiling Trends

Exploring the latest trends in bathroom tiling can help you create a stylish and modern space. Here are some of the hottest trends you should consider:

Large Format Terrazzo Tiles

Large format terrazzo tiles are making a big splash in bathroom design. Their oversized patterns and colorful chips give a contemporary twist to a classic material. These tiles are perfect for creating a seamless look with fewer grout lines, making your bathroom appear more spacious.

Glass Tiles

Glass tiles are a fantastic choice for adding a touch of elegance and light to your bathroom. They come in various colors and finishes, including glossy and frosted. Use them on walls or as a backsplash to reflect light and make the room feel brighter and more open.

Natural Stone

Natural stone tiles, such as marble, granite, and slate, bring a luxurious and timeless feel to any bathroom. These materials are not only beautiful but also durable and easy to maintain. Natural stone tiles can be used for floors, walls, and even shower enclosures to create a cohesive and upscale look.

Zellige

Zellige tiles are handmade, glazed terracotta tiles from Morocco. Each tile is unique, with slight variations in color and texture. This artisanal quality adds a rich, organic feel to your bathroom. Zellige tiles are perfect for creating a statement wall or an eye-catching backsplash.

Brown Ochre

Brown ochre is a warm, earthy color that is gaining popularity in bathroom design. This shade brings a sense of coziness and sophistication to the space. Use brown ochre tiles on the floor or walls to create a welcoming and grounded atmosphere.

Starry Floor Tile

Starry floor tiles feature intricate star patterns that add a whimsical touch to your bathroom. These tiles are great for creating a focal point on the floor, drawing the eye and adding visual interest. Pair them with simpler wall tiles to let the floor design shine.

Checkerboard Pattern

The checkerboard pattern is a classic design that never goes out of style. This pattern can be created using two contrasting tile colors, such as black and white, or more adventurous combinations like marigold and off-white. Checkerboard tiles can be used on both floors and walls to make a bold statement.

Checkerboard Pattern - bathroom tiling

Marigold and Off-White Checkerboard

A unique take on the classic checkerboard pattern, marigold and off-white tiles add a splash of color and a modern twist. This combination works beautifully with gold fixtures and can be complemented by a black pendant light to lift the overall look.

By incorporating these top trends into your bathroom design, you can create a space that is both stylish and functional. For more inspiration and to see these trends in action, visit our bathroom tiling services.

Next, let’s address some frequently asked questions about bathroom tiling to help you get started on your project.

Frequently Asked Questions about Bathroom Tiling

What is the correct way to tile a bathroom?

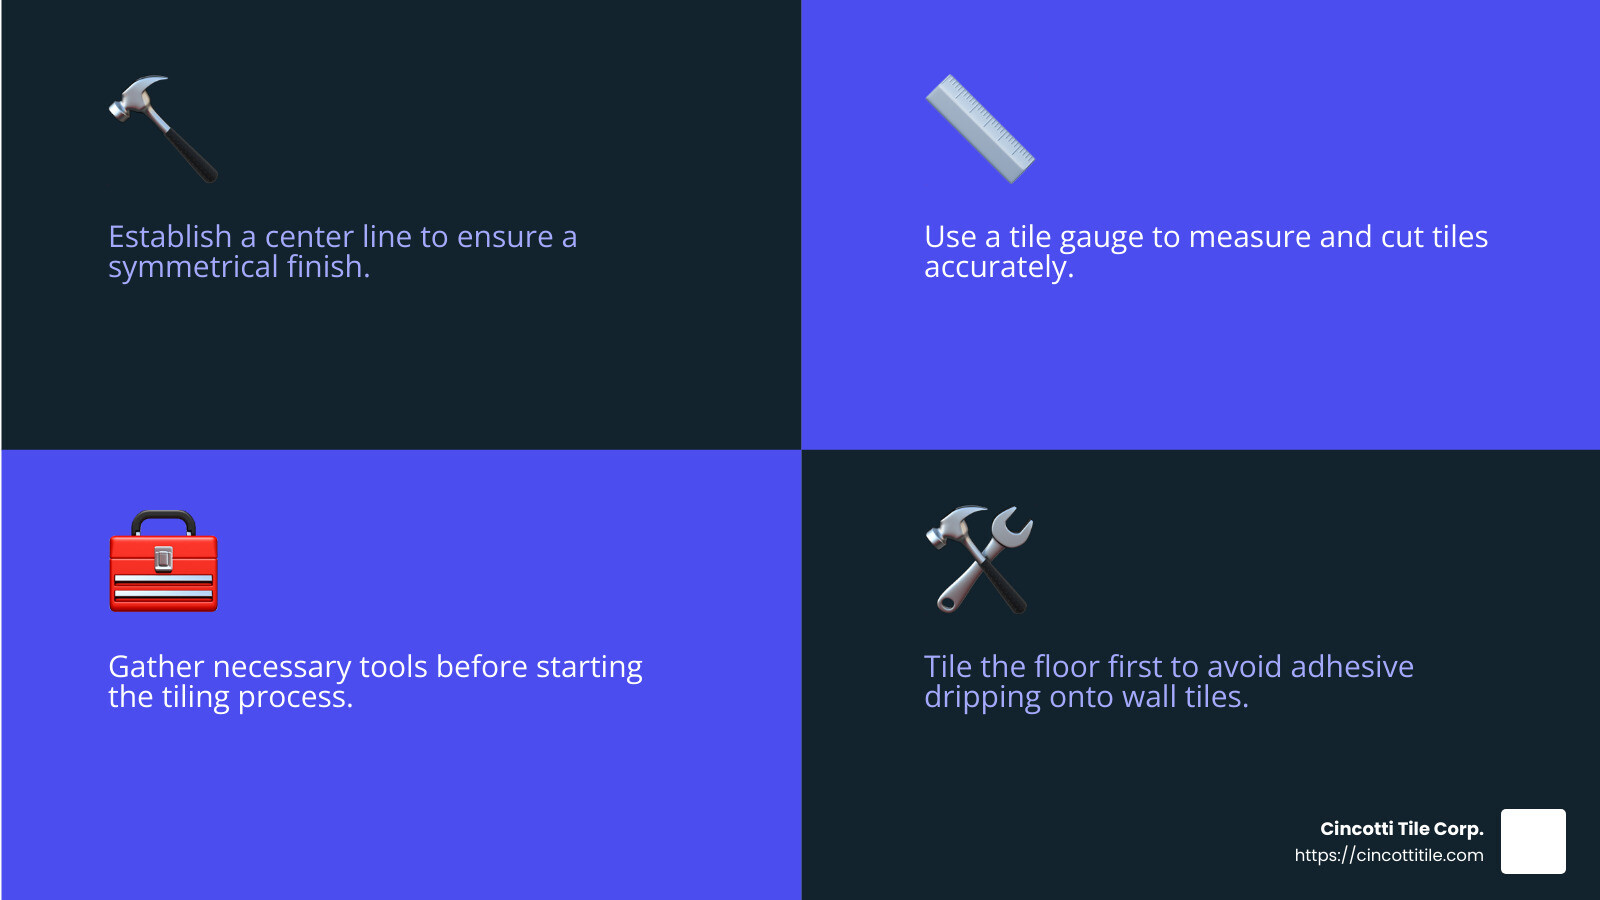
To achieve a professional look, start by establishing a center line. This helps ensure a symmetrical finish. Measure the width and height of your space, and mark the center point. Use a chalk line to create a vertical and horizontal guide.

Another crucial tool is a tile gauge. This helps you measure and cut tiles to the exact size needed. Always double-check your measurements before cutting.

Is tiling a bathroom difficult?

Tiling a bathroom is work, but it can be an enjoyable and rewarding experience. The key is patience and preparation. As Chris Bates from Tiles Gone Wild says, “The most important thing while installing any tile is patience. It’s a slow process that cannot be rushed without making mistakes.”

Start by gathering all necessary tools and materials, including a wet saw, tile mortar, and spacers. Follow a step-by-step guide and don’t hesitate to ask for help if needed. With attention to detail, you can achieve a high standard finish.

Should you tile the wall or floor first?

Always tile the floor first. This approach allows the floor tiles to set properly and makes wall tiling easier. By doing the floor first, you also avoid any adhesive dripping onto freshly laid wall tiles.

Waiting for the adhesive to dry is crucial. This ensures that the tiles stay in place and that the overall structure is sturdy. Once the floor is complete, you can move on to tiling the walls with confidence.

Patience is key when tiling. "The most important thing while installing any tile is patience. It’s a slow process that cannot be rushed without making mistakes." - bathroom tiling infographic 4_facts_emoji_blue

For more detailed guides and professional help, check out our bathroom tiling services.

Conclusion

When it comes to bathroom tiling, Cincotti Tile Corp. is your go-to expert in Billerica, MA, and the surrounding areas. With over 20 years of experience, we pride ourselves on our exceptional craftsmanship and competitive pricing.

Our premier residential tile installation services cover everything from bathroom floors and walls to backsplashes and shower stalls. We work closely with homeowners to bring their vision to life, ensuring a high-quality finish that improves both the beauty and functionality of their space.

Whether you’re looking to remodel your primary bath into a personal spa or add a touch of elegance to your powder room, our team has the expertise to get the job done right. We use only the best materials, including ceramic, porcelain, marble, and granite, to ensure durability and style.

For those in the Greater Boston and North Shore areas, our reputation speaks for itself. We are known for our professionalism, dependability, and dedication to customer satisfaction. Don’t just take our word for it; our stunning projects like the tile work at Café Escadrille in Burlington, MA, and the neat Emerald Rose in Billerica, MA, showcase our commitment to excellence.

Ready to transform your bathroom with top-notch tiling? Contact Cincotti Tile Corp. today for a free in-home consultation. Visit our bathroom tiling services page to learn more and get started on your next project.

For more detailed guides and professional help, check out our bathroom tiling services.

Shower Tiling Costs Explained: What to Expect

Understanding the Costs of Shower Tiling

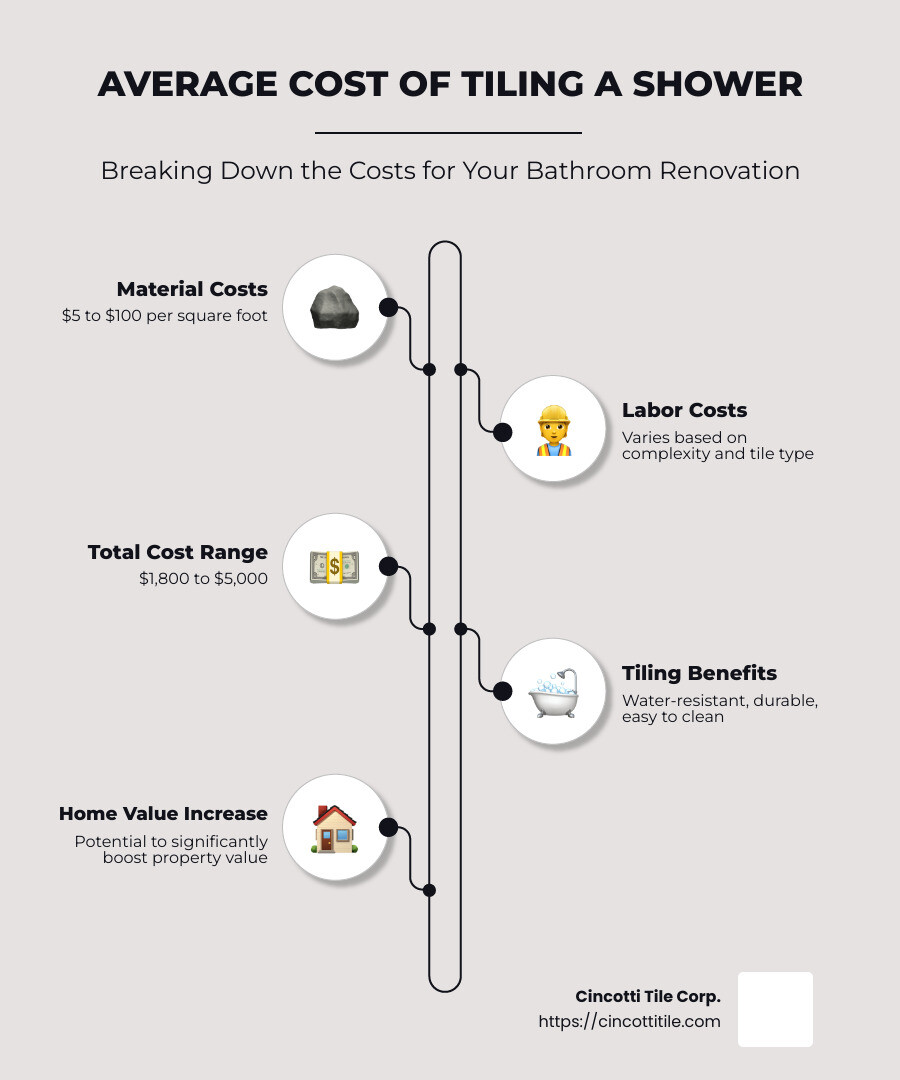
When considering a bathroom renovation, grasp the average cost of tiling a shower. On average, you can expect to spend between $1,800 and $5,000 for tiling a shower, depending on various factors such as the size, materials, and complexity of the design. Here’s a quick breakdown:

  • Material costs: $5 to $100 per square foot
  • Labor costs: Can vary based on installation complexity and tile type

Shower tiling not only revitalizes the look of your bathroom but also improves its functionality. Tiling provides excellent water resistance, which helps prevent leaks and water damage. Additionally, it’s durable, easy to clean, and can increase the value of your home significantly.

I’m Nicl Cincotti. With over two decades of experience in the tile industry, specializing in high-quality shower tiling, I understand the intricacies involved in these projects. Whether you’re tiling a small shower stall or a luxurious wet room, it’s crucial to know what to expect regarding costs and benefits.

Cost breakdown of shower tiling - average cost of tiling a shower infographic infographic-line-5-steps-neat_beige

Average Cost of Tiling a Shower

When considering a bathroom renovation, grasp the average cost of tiling a shower. On average, you can expect to spend between $1,800 and $5,000 for tiling a shower, depending on various factors such as the size, materials, and complexity of the design. Here’s a quick breakdown:

  • Material costs: $5 to $100 per square foot
  • Labor costs: Can vary based on installation complexity and tile type

Shower tiling not only revitalizes the look of your bathroom but also improves its functionality. Tiling provides excellent water resistance, which helps prevent leaks and water damage. Additionally, it’s durable, easy to clean, and can increase the value of your home significantly.

Material Costs

The type of tile you choose is one of the most significant factors affecting your overall cost. Here are some popular options:

  • Ceramic: $4.25 – $110 per sq.ft. installed. Ceramic tiles are versatile and come in many colors and patterns.
  • Porcelain: $17 – $46 per sq.ft. installed. Known for its durability and low maintenance.
  • Marble: $13 – $65 per sq.ft. installed. Offers a luxurious finish but requires sealing.
  • Slate: $13 – $27 per sq.ft. installed. Provides a rustic look, great for natural themes.
  • Glass: $19 – $65 per sq.ft. installed. Expensive but gives a sleek, modern appearance.
  • Pebble: $42 – $70 per sq.ft. installed. Unique and textured, often used for accents.
  • Terracotta: $10 – $30 per sq.ft. installed. Offers a warm, earthy feel, needs regular sealing.
  • Limestone: $13 – $45 per sq.ft. installed. Adds a rustic vibe, requires sealing.
  • Quarry Pavers: $13 – $40 per sq.ft. installed. Durable and available in various colors.
  • Granite: $17 – $65 per sq.ft. installed. Polished and durable, but not the most budget-friendly.

Labor Costs

Labor costs can vary widely depending on several factors:

  • Installation Complexity: More intricate designs and patterns require more time and skill, increasing labor costs.
  • Tile Type: Some tiles, like glass and large-format tiles, are more challenging to install, adding to labor costs.
  • Additional Treatments: Sealing and waterproofing treatments for tiles like marble and terracotta can add to the cost.

For example, installing slate tiles might cost around $13 to $27 per sq.ft. due to the need for specialized cutting and fitting, especially if the tiles are ungauged and naturally cleft.

Shower Tiling Costs Explained - average cost of tiling a shower

Case Study: A Typical Project Breakdown

Consider a 50 square foot shower tiled with slate costing $5 per sq.ft. for the material. Here’s a simple calculation:

  • Material Cost: 50 sq.ft. x $5 per sq.ft. = $250
  • Labor Cost: 50 sq.ft. x $10 per sq.ft. = $500

Total: $750

This example shows how quickly costs can add up, even for a relatively small shower area.

Additional Considerations

  • Extra Tile: Always buy 10% extra to cover breakage during installation.
  • Waterproofing: Ensure all 90-degree angles are filled with caulk to prevent leaks.
  • Sealing: Some tiles need sealing, adding to both material and labor costs.

By understanding these factors, you can better plan your budget and make informed decisions about your shower tiling project.

Next, we’ll dive deeper into the costs associated with different types of shower tiles to help you choose the best option for your needs.

Shower Tile Costs by Type

When it comes to tiling a shower, the type of tile you choose can significantly impact the overall cost. Here’s a breakdown of the most popular types of shower tiles, along with their costs and characteristics:

Ceramic Tile

Cost: $4.25 – $110 per sq.ft. installed

Ceramic tiles are a versatile and affordable option. They come in a vast range of colors, patterns, and sizes. Labor costs for ceramic tiles range from $3 to $10 per sq.ft.

Pros:
– Budget-friendly
– Easy to clean
– Wide variety of designs

Cons:
– Can chip or crack
– Requires regular grout maintenance

Porcelain Tile

Cost: $17 – $46 per sq.ft. installed

Porcelain tiles are known for their durability and low maintenance. They are made from compressed clay dust fired at high temperatures, making them impervious to moisture and stains.

Pros:
– Highly durable
– Stain-resistant
– Available in large formats

Cons:
– More expensive than ceramic
– Can be slippery when wet

Marble Tile

Cost: $13 – $65 per sq.ft. installed

Marble tiles offer a luxurious and timeless look but require regular sealing to prevent staining. Labor costs for marble range from $10 to $15 per sq.ft.

Pros:
– Neat and sophisticated appearance
– Various finishes available

Cons:
– Requires sealing
– Can be prone to staining and scratching

Slate Tile

Cost: $13 – $27 per sq.ft. installed

Slate provides a rustic and natural look, perfect for creating an earthy bathroom vibe. Labor costs for slate are generally $10 to $12 per sq.ft. due to the need for specialized cutting.

Pros:
– Natural, rustic appearance
– Durable and slip-resistant

Cons:
– Requires regular sealing
– Can be uneven, making installation tricky

Glass Tile

Cost: $19 – $65 per sq.ft. installed

Glass tiles are sleek and modern but can be expensive. They are smooth, water-resistant, and stain-resistant, though even small flaws can be noticeable.

Pros:
– Modern and sleek look
– Stain and water-resistant

Cons:
– Expensive
– Shows imperfections easily

Pebble Tile

Cost: $42 – $70 per sq.ft. installed

Pebble tiles create a unique, textured surface and are often used for accent walls or entire shower spaces. Labor costs for pebble tiles range from $12 to $30 per sq.ft.

Pros:
– Unique, natural look
– Textured and slip-resistant

Cons:
– Expensive
– Difficult to clean

Terracotta Tile

Cost: $10 – $30 per sq.ft. installed

Terracotta tiles offer a warm, earthy feel and are made from clay. They require sealing due to their porous nature. Labor costs for terracotta tiles range from $3 to $10 per sq.ft.

Pros:
– Warm, rustic appearance
– Affordable

Cons:
– Requires regular sealing
– Can be porous and prone to staining

Limestone Tile

Cost: $13 – $45 per sq.ft. installed

Limestone tiles add a rustic vibe to any bathroom but require sealing. Labor costs for limestone range from $10 to $15 per sq.ft.

Pros:
– Earthy, neutral tones
– Durable when sealed

Cons:
– Requires regular sealing
– Some types are not suitable for wet areas

Quarry Pavers

Cost: $13 – $40 per sq.ft. installed

Quarry pavers are durable and available in various colors. They are a good alternative to terracotta. Labor costs for quarry pavers range from $3 to $10 per sq.ft.

Pros:
– Durable
– Variety of colors and patterns

Cons:
– Can be thick and heavy
– Requires sealing if unglazed

Granite Tile

Cost: $17 – $65 per sq.ft. installed

Granite tiles are polished and durable, often used in contemporary showers. Labor costs for granite range from $7 to $15 per sq.ft.

Pros:
– Polished, high-end look
– Highly durable

Cons:
– Expensive
– Limited design options

Understanding the costs and characteristics of different tile types can help you make an informed decision for your shower tiling project. Next, we’ll explore how the finish of your tiles can impact both the look and cost of your shower.

Shower Tile Costs by Finish

The finish of your shower tiles can significantly impact both the aesthetic and the cost of your project. Here, we’ll break down the costs and features of the most common finishes: glossy, matte, rustic, and metallic.

Glossy Finish

Cost: $4.25 – $65 per sq.ft. installed

Glossy tiles have a shiny, reflective surface that can make your bathroom look brighter and more spacious. They are often used for a sleek and modern look.

Pros:
– Reflects light, making spaces appear larger
– Easy to clean
– Available in a wide range of colors and patterns

Cons:
– Can be slippery when wet
– Shows water spots and fingerprints easily

Matte Finish

Cost: $6 – $65 per sq.ft. installed

Matte tiles have a flat, non-reflective surface. They are perfect for creating a more subtle, understated look in your shower.

Pros:
– Slip-resistant
– Hides water spots and fingerprints
– Provides a modern, sophisticated look

Cons:
– Can be harder to clean than glossy tiles
– May require more frequent cleaning to avoid soap scum buildup

Rustic Finish

Cost: $13 – $110 per sq.ft. installed

Rustic tiles often have a textured, natural appearance. They can bring an earthy, organic feel to your bathroom.

Pros:
– Unique, natural look
– Slip-resistant due to texture
– Adds warmth and character

Cons:
– Can be more difficult to clean
– Often requires sealing to prevent staining

Metallic Finish

Cost: $23 – $65 per sq.ft. installed

Metallic tiles have a glaze containing metal, giving them a shiny, reflective finish with a modern twist.

Pros:
– Unique and eye-catching
– Reflects light, adding depth and dimension
– Durable and easy to clean

Cons:
– Can be expensive
– Limited color options

Understanding the impact of tile finishes on both cost and aesthetics can help you make the best choice for your shower renovation. Next, we’ll dive into the different patterns you can use to tile your shower and how they impact the overall cost.

Shower Tile Costs by Pattern

The pattern you choose for your shower tiles can dramatically affect both the look and cost of your project. Here’s a breakdown of some popular patterns and their associated costs:

Straight Set

Cost Increase: None

The straight set pattern is the most basic and cost-effective option. Tiles are aligned in a grid, creating a clean and straightforward look. This pattern works well with both square and rectangular tiles.

Pros:
– Simple and easy to install
– Minimal waste, keeping costs low
– Works with any tile size and material

Cons:
– Basic look, may lack visual interest

Diagonal

Cost Increase: 20%

Also known as the diamond pattern, diagonal tiles are turned on their points. This creates a dynamic and unique appearance but requires more cuts and precision, increasing labor costs.

Pros:
– Adds visual interest and a sense of movement
– Makes small showers appear larger

Cons:
– More material waste
– Higher labor costs due to complexity

Running Bond

Cost Increase: 10-15%

Commonly known as the offset or subway pattern, the running bond uses rectangular or square tiles with each row offset by half a tile. This classic pattern adds a subtle texture to your shower.

Pros:
– Timeless and versatile
– Hides imperfections in wall alignment

Cons:
– Slightly higher labor costs
– Requires more planning to ensure alignment

Herringbone

Cost Increase: 20%

The herringbone pattern involves laying rectangular tiles at angles to create a zigzag effect. This intricate design is time-consuming but adds a stylish and sophisticated touch to any shower.

Pros:
– Highly decorative and eye-catching
– Adds a sense of luxury

Cons:
– High labor costs due to complexity
– More material waste

Large Format

Cost Increase: Varies

Large format tiles create a contemporary look with fewer grout lines. While they are popular for shower walls, they cannot be used on floors due to drainage issues.

Pros:
– Modern and sleek appearance
– Easier to clean with fewer grout lines

Cons:
– Higher cost for materials and installation
– Requires careful handling to prevent breakage

Mosaic

Cost Increase: 10-20%

Mosaic tiles, often installed in sheets, can add intricate designs and patterns to your shower. They are especially popular for creating accents or focal points.

Pros:
– Versatile and customizable
– Available in various materials, including glass and stone

Cons:
– Higher installation costs, especially for paper-faced mosaics
– More grout lines to clean

Accent Wall

Cost Increase: 20-30%

An accent wall involves using a different pattern or tile in a framed section of the shower. This adds detail and visual interest, making it a focal point.

Pros:
– Customizable and unique
– Improves the overall design

Cons:
– Higher material and labor costs
– Requires precise planning and execution

Decorative Border

Cost Increase: 10-30%

Adding a decorative border can break up the monotony of a single tile design. Borders can be created by cutting mosaic sheets into strips or using specially designed tiles.

Pros:
– Adds a finishing touch to the design
– Can be a cost-effective way to add detail

Cons:
– Increases overall project cost
– Requires careful alignment

Understanding Shower Tile Patterns and Costs - average cost of tiling a shower infographic 4_facts_emoji_nature

Choosing the right pattern for your shower tiles involves balancing aesthetics with budget. Each pattern has its own set of advantages and drawbacks, so consider what will work best for your space and style.

Next, we’ll explore the costs involved in retiling a shower, including removal and potential additional issues.

Costs to Retile a Shower

Retiling a shower involves more than just picking out new tiles. Here’s what you need to know about the costs and process involved.

Removal Costs

Before you can install new tiles, the old ones need to come off. Removing old tiles generally costs between $2 to $5 per square foot. For a standard 3′ x 4′ shower with 8′ high walls, this could range from $184 to $460. Older tiles set in mud over a lath can be more expensive to remove.

Retiling Process

Once the old tiles are gone, the retiling process begins. Here’s a step-by-step breakdown:

  1. Inspection: Check the walls behind the tiles for issues like mold or leaks.
  2. Waterproofing: Install a waterproofing membrane over the studs to prevent moisture damage. This membrane costs about $10 per roll.
  3. Backer Board Installation: A cement backer board, treated for wet areas, is installed next.
  4. Tile Installation: New tiles are then installed, and grout is applied.

Additional Issues

During the retiling process, unexpected issues can arise:

  • Mold: If mold is found, it must be removed before new tiles are installed. This can add to both time and cost.
  • Leaking Pipes: Any leaks must be fixed to prevent future damage. This might require a plumber, adding to the overall expense.

Labor Costs

Labor costs vary depending on the complexity of the job and the type of tile. For example, labor for ceramic tiles ranges from $3 to $10 per square foot, while labor for more intricate tiles like pebble or mosaic can go up to $30 per square foot.

Here’s a quick reference table:

Tile Type Labor Cost per Sq.Ft.
Ceramic $3 – $10
Slate $10 – $12
Mosaic $10 – $25
Porcelain $14 – $16
Pebble $12 – $30

Total Costs

Considering both material and labor, retiling a shower can cost between $1,800 to $5,000 on average. Always budget for potential additional costs like mold removal or plumbing repairs.

Retiling your shower can be a significant investment, but it offers a chance to address underlying issues and update your bathroom’s look. Next, we’ll discuss the pros and cons of tiling a shower, helping you decide if it’s the right choice for your home.

Pros and Cons of Tiling a Shower

Tiling a shower can be a fantastic investment, but it comes with its own set of benefits and drawbacks. Let’s break down what you need to know.

Versatility

Tiles are incredibly versatile, making them suitable for any shower size or shape. From small enclosures to expansive walk-ins, tiles can be cut and laid to fit perfectly. Plus, the range of materials and designs available means you can achieve any look you desire, from sleek modern to rustic charm.

Customization

Customization is another strong point. With tiles, you have endless options for colors, patterns, and textures. Want a herringbone pattern? No problem. Prefer a mosaic accent wall? You got it. You can even mix and match different tile types to create a unique design that reflects your style.

Maintenance

Maintenance varies depending on the tile material. Ceramic, porcelain, and glass tiles are relatively low-maintenance and can be cleaned with standard bathroom cleaners. However, natural stone tiles like limestone and terracotta require sealing and more frequent care to keep them looking their best.

Grout Staining

Grout is a common pain point. Grout lines can stain and discolor over time, especially in a wet environment like a shower. Regular cleaning can help, but you may also need to reseal the grout periodically to keep it looking fresh.

“All tile has grout, which can stain and discolor,” according to our research. This means extra work to keep your shower looking pristine.

Sealing Requirements

Sealing is crucial for certain tile types. Natural stone tiles and porous materials like terracotta need to be sealed to prevent water damage. This isn’t a one-time job; you’ll need to reseal these tiles every few years. If you notice that water no longer beads off the surface, it’s time for a new coat of sealer.

Pros and Cons Table

Pros Cons
Highly versatile Can be more expensive than alternatives
Customizable to any design Grout can stain and discolor
Durable and long-lasting Natural stone tiles require sealing
Can increase home value Higher initial cost and maintenance

In summary, while tiling a shower offers best versatility and customization, it also requires ongoing maintenance, especially for grout and certain tile types. Next, we’ll explore maintenance tips for keeping your tiled shower in top condition.

Maintenance Tips for Tiled Showers

Maintaining a tiled shower can keep it looking fresh and extend its lifespan. Here are some essential tips for cleaning, sealing, and general upkeep.

Cleaning

Regular cleaning is crucial to prevent soap scum and mildew buildup. For ceramic, porcelain, and glass tiles, you can use standard bathroom cleaners. Make sure to:

  • Wipe down the tiles after each use to minimize water spots and soap residue.
  • Use a mild, non-abrasive cleaner for regular cleanings. A mixture of vinegar and water works well.
  • Scrub grout lines with a small brush to remove mold and mildew. A toothbrush can be perfect for this task.

“A clean shower not only looks better but is also healthier,” says our research.

Sealing

Sealing is essential for natural stone tiles like limestone and terracotta. It prevents water from seeping into the tile and causing damage. Here’s what you need to know:

  • Seal before grouting to protect the tiles during installation.
  • Re-seal every 3-5 years for limestone and terracotta. If water no longer beads on the surface, it’s time to re-seal.
  • Use a silicone-based impregnating sealer designed for your specific tile type.

For grout, consider using a grout sealer to prevent staining and discoloration. Some grouts come pre-sealed, but if yours doesn’t, sealing can save you a lot of cleaning time in the long run.

Product Recommendations

Choosing the right products can make maintenance easier. Here are some recommendations:

  • For daily cleaning: A squeegee and a mild cleaner like vinegar and water.
  • For deep cleaning: A non-abrasive bathroom cleaner and a small brush for grout lines.
  • For sealing: A high-quality silicone-based impregnating sealer for natural stone and a grout sealer for grout lines.

Maintenance Schedule

Sticking to a maintenance schedule ensures your tiled shower stays in top condition. Here’s a simple schedule to follow:

  • Daily: Wipe down tiles with a squeegee.
  • Weekly: Clean tiles and grout with a mild cleaner.
  • Monthly: Inspect grout lines and touch up with grout sealer if needed.
  • Every 3-5 years: Re-seal natural stone tiles.

Keeping up with these tasks will help maintain the beauty and functionality of your tiled shower.

By following these maintenance tips, you can enjoy a clean and beautiful tiled shower for years to come. Next, we’ll answer some frequently asked questions about shower tiling costs.

Frequently Asked Questions about Shower Tiling Costs

What is the average cost of tiling a shower?

The average cost of tiling a shower ranges between $1,800 and $5,000. Most homeowners spend around $2,700 for a 3’ x 4’ shower with 8’ walls tiled in ceramic with a running bond pattern and a mosaic floor.

Costs can vary widely based on factors like:

  • Tile type: Ceramic tiles can be as low as $1.25 per sq.ft., while pebble tiles can cost up to $40 per sq.ft..
  • Labor: Installation labor can range from $7 to $20+ per sq.ft. Complex patterns or high-end materials can increase this cost.
  • Additional materials: Grout, sealant, and mortar add to the total expense.

How much does labor cost to tile a shower?

The labor cost to tile a shower varies based on several factors:

  • Tile type: Simple ceramic tiles cost less to install than intricate mosaic or pebble tiles.
  • Pattern complexity: Uniform patterns are cheaper; complex designs like herringbone can double the labor cost.
  • Location and size: Larger showers and those with difficult-to-reach areas can increase labor costs.

On average, expect to pay between $7 and $20+ per sq.ft. for professional installation.

Additional Factors to Consider

  • Removing old tiles: Professional removal ensures no damage to walls or floors, adding to the cost but worth it.
  • Waterproofing: A waterproofing membrane adds around $1 per sq.ft. but is essential for preventing leaks.
  • Extra tiles: Always buy at least 10% more tiles than needed to cover breakage during installation.

By understanding these costs and factors, you can plan your shower tiling project more effectively. Next, we’ll explore the costs associated with different types of shower tiles.

Conclusion

In summary, tiling a shower can range from $1,800 to $5,000, depending on factors like tile type, labor, and additional materials. While it may be more expensive than a shower insert, the customization and luxurious feel of tiles can make it a worthwhile investment.

At Cincotti Tile Corp., we pride ourselves on our exceptional craftsmanship and competitive pricing. With over 20 years of experience, we ensure that every project is completed to the highest standards. Our team guides you through every step, from the initial consultation to the final walkthrough, ensuring a smooth and stress-free experience.

Whether you’re looking to transform your bathroom into a modern oasis or a rustic retreat, we have the expertise and selection to make your vision a reality.

Request Your Free Tile Installation Estimate Today and let us help you create the bathroom of your dreams.

Top Tips for Bathroom Tile Installation in Billerica, MA

Enhancing Your Home with Professional Bathroom Tile Installation in Billerica, MA

When it comes to bathroom tile installation billerica ma, hiring professional services can significantly lift both the aesthetics and functionality of your bathroom. Whether you’re aiming for a luxurious spa-like retreat or a stylish, yet practical space, investing in high-quality tile work offers numerous benefits.

Quick Overview for Billerica Homeowners:

  1. Experience Matters: Choose a service with extensive experience like Cincotti Tile Corp., boasting over 20 years in the industry.
  2. Comprehensive Services: Look for providers offering a range of services, from shower tiles to custom designs.
  3. Quality and Durability: Opt for tiles known for their durability and visual appeal, such as ceramic, porcelain, marble, and granite.

Importance of Professional Tile Installation:

Professional tile installation ensures your bathroom not only looks stunning but also stands the test of time. With expert craftsmanship, you avoid common pitfalls like improper measurements or inadequate sealing, which can lead to costly repairs down the line.

Choosing professional tile installation provides:

  • Durability: Professionally installed tiles can withstand heavy use and moisture exposure.
  • Aesthetic Variety: A wide range of styles, colors, and materials to match your design preferences.
  • Low Maintenance: Tiles are easy to clean and maintain, ensuring they remain beautiful for years to come.
  • Health Benefits: Tiles are hypoallergenic and do not trap dust or allergens, contributing to better indoor air quality.

Transform your bathroom into a space of beauty and practicality with expert tile installation, making your daily routines more enjoyable and your home more appealing to potential buyers.

Benefits of Professional Bathroom Tile Installation in Billerica - bathroom tile installation billerica ma infographic infographic-line-5-steps-colors

Understanding the Costs of Bathroom Tile Installation

When considering bathroom tile installation in Billerica, MA, understanding the costs involved is crucial for effective budgeting. Here’s a breakdown:

Cost Per Square Foot

The cost per square foot for tile installation varies based on the type of tile you choose.

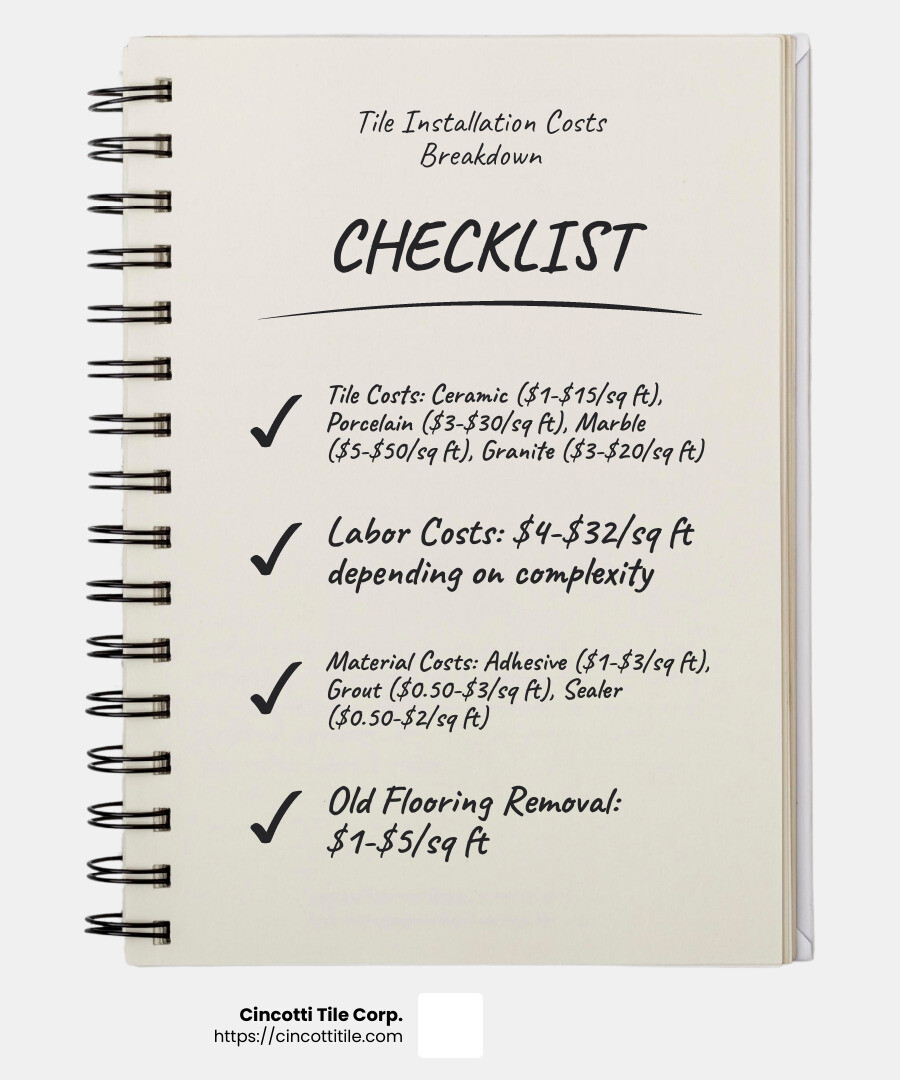
  • Ceramic Tile: Typically ranges from $1 to $15 per square foot.
  • Porcelain Tile: Costs between $3 and $30 per square foot.
  • Marble Tile: Can be anywhere from $5 to $50 per square foot.
  • Granite Tile: Often costs between $3 and $20 per square foot.

Labor Costs

Labor costs can significantly impact your overall budget. In Billerica, MA, professional tile installers generally charge between $4 and $32 per square foot, depending on the complexity of the project and the type of tile being installed.

Pro Tip: Hiring experienced professionals like Cincotti Tile Corp. ensures high-quality workmanship, which can save you money on future repairs and maintenance.

Material Costs

Apart from the tiles themselves, other materials are essential for a successful installation:

  • Adhesive: Costs around $1 to $3 per square foot.
  • Grout: Typically ranges from $0.50 to $3 per square foot.
  • Sealer: Can add an additional $0.50 to $2 per square foot.

Removal of Old Flooring

Before new tiles can be installed, the old flooring often needs to be removed. This process can cost between $1 and $5 per square foot, depending on the type of existing flooring and its condition.

Tile installation cost breakdown - bathroom tile installation billerica ma infographic checklist-notebook

Additional Costs to Consider

  • Underlayment: This layer is crucial for a smooth installation and adds about $1 to $5 per square foot.
  • Waterproofing: Essential for bathrooms, waterproofing costs can range from $1 to $3 per square foot.

By understanding these costs, you can better plan your bathroom renovation and avoid unexpected expenses. Whether you’re opting for luxurious marble tiles or durable porcelain, knowing what to expect financially is the first step toward a successful project.

Next, we’ll explore how to choose the right tile for your bathroom.

Choosing the Right Tile for Your Bathroom

Selecting the right tile for your bathroom is essential for both functionality and aesthetics. Here’s a quick guide to help you make the best choice.

Ceramic Tile

Ceramic tiles are a popular choice due to their affordability and versatility. They come in various colors, patterns, and sizes, making it easy to match any design scheme.

  • Durability: Ceramic tiles are less durable compared to other options, but they are still a good choice for low-traffic areas.
  • Aesthetics: They offer a classic look and can mimic the appearance of natural stone or wood.

Porcelain Tile

Porcelain tiles are a step up from ceramic in terms of durability and water resistance. They are denser and less porous, making them ideal for bathroom floors and walls.

  • Durability: Highly durable and resistant to wear, scratches, and moisture.
  • Aesthetics: Available in a wide range of styles, including options that resemble natural stone, wood, or even fabric.

Marble Tile

Marble tiles bring a touch of luxury and elegance to any bathroom. Their natural veining and unique patterns make each tile one-of-a-kind.

  • Durability: While beautiful, marble is softer and more prone to scratching and staining. It requires regular sealing to maintain its appearance.
  • Aesthetics: Offers a timeless, upscale look that can lift the overall design of your bathroom.

Granite Tile

Granite tiles are known for their strength and durability. They are an excellent choice for high-traffic areas and can withstand heavy use.

  • Durability: Extremely hard and resistant to scratches, stains, and moisture. Granite tiles can last a lifetime with proper care.
  • Aesthetics: Available in a variety of colors and patterns, granite adds a sophisticated, natural look to your bathroom.

Durability and Aesthetics

When choosing tiles, consider both durability and aesthetics.

  • Durability: For high-traffic areas or households with children, porcelain or granite tiles are ideal due to their resilience.
  • Aesthetics: If you’re aiming for a luxurious appearance, marble tiles are best in beauty but require more maintenance.

Expert Advice

For personalized recommendations and expert installation, consider consulting with professionals like Cincotti Tile Corp. Their extensive experience and wide selection of tile materials ensure you get the best results custom to your needs.

Next, we’ll discuss how to prepare your bathroom for tile installation.

Preparing Your Bathroom for Tile Installation

Proper preparation is crucial for a successful bathroom tile installation. Here’s a step-by-step guide to get your bathroom ready.

Surface Preparation

Before any tile can be laid, the surface must be properly prepared.

  1. Clean the Surface: Remove any old flooring, adhesives, or debris. A clean, smooth surface is essential for tiles to adhere properly.
  2. Repair Any Damage: Fix any cracks, holes, or uneven areas on the floor or walls. Use a patching compound for small imperfections.
  3. Level the Surface: Ensure the surface is level. Use a leveling compound if necessary. Uneven surfaces can lead to tile misalignment and cracking.

Waterproofing

Waterproofing is a critical step, especially in bathrooms where moisture is prevalent.

  1. Apply a Waterproof Membrane: Use a waterproof membrane on floors and walls, particularly in shower areas. This prevents water from seeping through and causing damage.
  2. Seal Joints and Corners: Pay special attention to joints and corners. Use waterproof tape or sealant to ensure these areas are fully protected.

Underlayment

An underlayment provides a stable base for tile installation and helps prevent cracks.

  1. Choose the Right Underlayment: Cement board is a popular choice for bathrooms due to its durability and moisture resistance.
  2. Install the Underlayment: Secure the cement board to the floor or walls using screws. Ensure there are no gaps or overlaps.

Tools Needed

Having the right tools makes the installation process smoother and more efficient.

  1. Tile Cutter: For cutting tiles to fit around edges and corners.
  2. Notched Trowel: Used to spread adhesive evenly.
  3. Level: Ensures tiles are laid evenly.
  4. Rubber Mallet: Helps to gently tap tiles into place.
  5. Grout Float: Used for applying grout between tiles.
  6. Sponge and Bucket: For cleaning excess grout and adhesive.

Proper preparation sets the stage for a flawless tile installation. Next, we’ll walk you through the step-by-step process of installing bathroom tiles.

Step-by-Step Guide to Bathroom Tile Installation

Ready to transform your bathroom with beautiful new tiles? Let’s dive into the step-by-step process of bathroom tile installation in Billerica, MA.

Measuring

Accurate measurements are essential for a smooth installation.

  1. Measure the Area: Use a tape measure to determine the total area to be tiled. Measure both the length and width of the floor or wall.
  2. Calculate Tile Quantity: Divide the total area by the size of one tile to estimate how many tiles you’ll need. Always buy extra tiles to account for cuts and mistakes.

Cutting Tiles

Cutting tiles to fit around edges and fixtures is a crucial step.

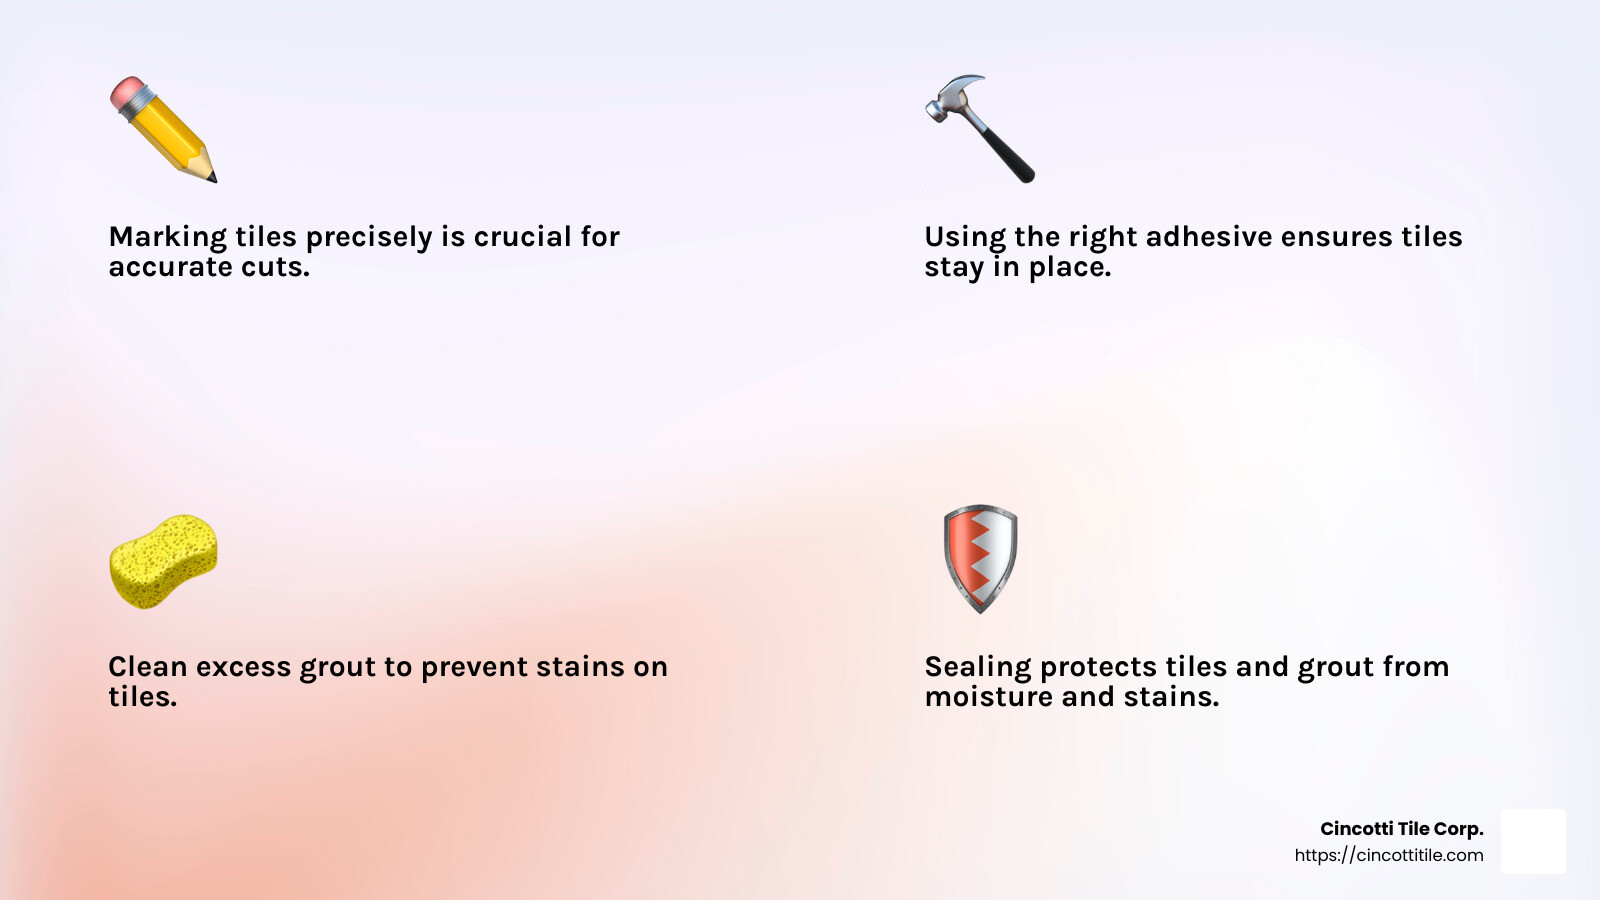
  1. Mark the Tiles: Use a pencil to mark where cuts are needed. Ensure your measurements are precise.
  2. Use a Tile Cutter: A manual tile cutter works for straight cuts. For more intricate cuts, use a wet saw or a tile nipper. Always wear safety goggles!

Applying Adhesive

The adhesive is what holds your tiles in place.

  1. Choose the Right Adhesive: Use thin-set mortar for most bathroom tiles. It’s durable and water-resistant.
  2. Spread the Adhesive: Apply the adhesive with a notched trowel. Spread it evenly over a small section of the surface to prevent it from drying out too quickly.
  3. Press Tiles into Place: Gently press each tile into the adhesive. Use a level to ensure they’re even. A rubber mallet can help tap them into place if needed.

Grouting

Grout fills the spaces between tiles and secures them.

  1. Mix the Grout: Follow the manufacturer’s instructions to mix the grout to the right consistency.
  2. Apply the Grout: Use a grout float to spread the grout over the tiles, pressing it into the gaps. Work in small sections to ensure even coverage.
  3. Clean Excess Grout: After applying the grout, use a damp sponge to wipe off excess grout from the tile surfaces. Rinse the sponge frequently to keep it clean.

Sealing

Sealing protects your tiles and grout from moisture and stains.

  1. Allow Grout to Cure: Let the grout cure for the recommended time, usually 24-48 hours.
  2. Apply Sealant: Use a grout sealer to protect the grout lines. Apply it with a small brush or applicator, and follow the manufacturer’s instructions for drying times.

Properly sealed tiles are crucial for long-lasting bathroom installations. - bathroom tile installation billerica ma infographic 4_facts_emoji_light-gradient

By following these steps, you can achieve a professional-looking tile installation. Proper measuring, cutting, adhesive application, grouting, and sealing are key to a successful project. Next, we’ll discuss common mistakes to avoid during tile installation.

Common Mistakes to Avoid During Tile Installation

Avoiding common mistakes can save you time, money, and frustration during your bathroom tile installation in Billerica, MA. Here are some pitfalls to watch out for:

Improper Measurements

Accurate measurements are crucial. Incorrect measurements can lead to wasted materials and uneven tile placement.

  • Double-Check Measurements: Always measure twice before cutting to ensure precision.
  • Account for Grout Lines: Include space for grout lines in your measurements to avoid gaps or uneven spacing.

Wrong Adhesive

Using the wrong adhesive can cause tiles to loosen or not adhere properly.

  • Match Adhesive to Tile Type: Use thin-set mortar for most ceramic and porcelain tiles. For glass or stone tiles, use an adhesive recommended by the manufacturer.
  • Check for Water Resistance: Ensure the adhesive is suitable for wet areas like bathrooms.

Insufficient Grout

Grout holds tiles together and prevents water from seeping underneath.

  • Apply Evenly: Use a grout float to press grout into all gaps. Incomplete grouting can lead to loose tiles and water damage.
  • Clean Excess Quickly: Wipe off excess grout from the tile surface before it dries to avoid a messy finish.

Lack of Sealing

Sealing is essential to protect your tiles and grout from moisture and stains.

  • Seal Grout Lines: Apply a grout sealer after the grout has cured. This step prevents mold and mildew.
  • Reapply Regularly: Grout sealer needs to be reapplied every few years to maintain its effectiveness.

By avoiding these common mistakes, you can ensure a long-lasting and beautiful tile installation. Proper measurements, the right adhesive, sufficient grout, and regular sealing are key to a successful project.

Next, let’s address some frequently asked questions about bathroom tile installation in Billerica, MA.

Frequently Asked Questions about Bathroom Tile Installation in Billerica, MA

How much does it cost to install bathroom tile in Billerica, MA?

The cost of bathroom tile installation in Billerica, MA can vary widely. On average, you can expect to pay between $10 to $50 per square foot. This range includes both materials and labor.

Factors affecting cost:

  • Type of Tile: Ceramic tiles are generally more affordable than marble or granite tiles. Porcelain tiles fall somewhere in between.
  • Labor Costs: Experienced professionals may charge more, but their expertise can save you money in the long run by avoiding costly mistakes.
  • Old Flooring Removal: If you need to remove old flooring, this will add to the overall cost.
  • Complexity of Design: Intricate patterns or custom designs will increase labor costs.

What is the best type of tile for a bathroom?

Choosing the right tile for your bathroom is crucial for durability and aesthetics.

  • Ceramic Tile: Affordable and available in various designs, ceramic tiles are a popular choice. They are durable but less water-resistant compared to other options.
  • Porcelain Tile: Highly durable and water-resistant, porcelain tiles are ideal for bathrooms. They are slightly more expensive than ceramic tiles.
  • Marble Tile: Offers a luxurious look but requires more maintenance and is prone to staining.
  • Granite Tile: Extremely durable and water-resistant but can be more expensive.

Durability and Water Resistance:

  • Porcelain: Best for water resistance and durability.
  • Ceramic: Good for general use but less water-resistant.
  • Marble and Granite: Excellent for aesthetics but require more maintenance.

How long does it take to install bathroom tile?

The time frame for bathroom tile installation in Billerica, MA depends on several factors, including the size of the bathroom and the complexity of the design.

General Time Frame:

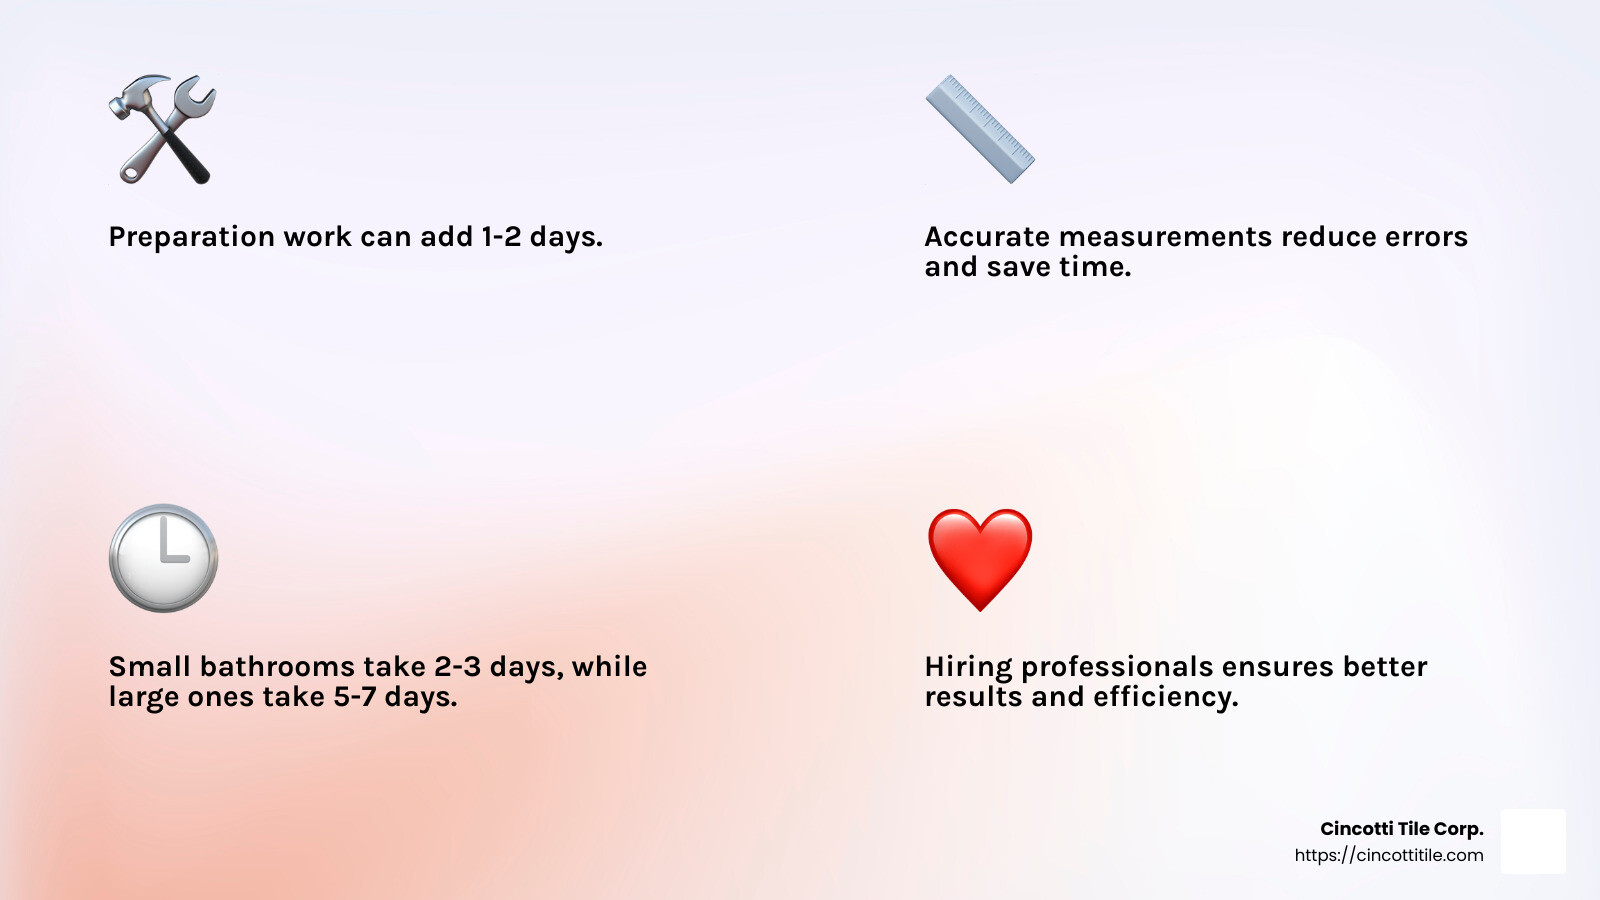
  • Small Bathrooms: Typically, 2 to 3 days.
  • Medium to Large Bathrooms: 4 to 7 days.

Factors affecting duration:

  • Preparation Work: Removing old tiles and preparing the surface can add a day or more.
  • Tile Type and Size: Larger tiles cover more area quickly, but smaller tiles or intricate designs take longer.
  • Drying and Curing Time: Adhesive and grout need time to dry and cure, which can add to the overall duration.

Understanding these factors can help you plan better and set realistic expectations for your bathroom tile installation project.

Conclusion

Choosing the right professionals for your bathroom tile installation in Billerica, MA is crucial for a successful and stress-free project. At Cincotti Tile Corp., we bring over 20 years of experience and a commitment to exceptional craftsmanship to every job we undertake.

Our team specializes in installing various types of tiles, including ceramic, porcelain, marble, and granite. Whether you’re looking to revamp your bathroom floor, walls, or shower, we have the expertise to deliver stunning results that stand the test of time.

Why Choose Cincotti Tile Corp.?

  • Experience: With over two decades in the industry, our knowledge and skills ensure top-quality workmanship.
  • Comprehensive Services: From surface preparation to final sealing, we handle every step of the installation process.
  • Competitive Pricing: We offer affordable rates without compromising on quality, making your dream bathroom a reality within your budget.
  • Customer Satisfaction: Our dedication to professionalism and reliability has earned us a solid reputation in Billerica and beyond.

Free In-Home Consultation

We understand that every bathroom is unique, and so are your needs. That’s why we offer a free in-home consultation to discuss your project in detail. Our experts will assess your space, provide design recommendations, and offer a detailed estimate to help you make an informed decision.

Contact Us Today

Ready to transform your bathroom with beautiful, durable tile? Contact Cincotti Tile Corp. today to schedule your free consultation. Request an estimate online.

Experience the difference that our expertise and commitment to quality can make. Choose Cincotti Tile Corp. for all your tile installation needs in Billerica, MA, and beyond.

Top Tips for Shower and Bathroom Tile Installation in Lexington, MA

Transform Your Bathroom with Expert Tile Installation in Lexington, MA

Bathroom tile installation lexington ma is a popular home improvement project that can significantly improve the look and functionality of your space. Whether you’re updating a small powder room or remodeling a master bath, professional tile installation offers numerous benefits:

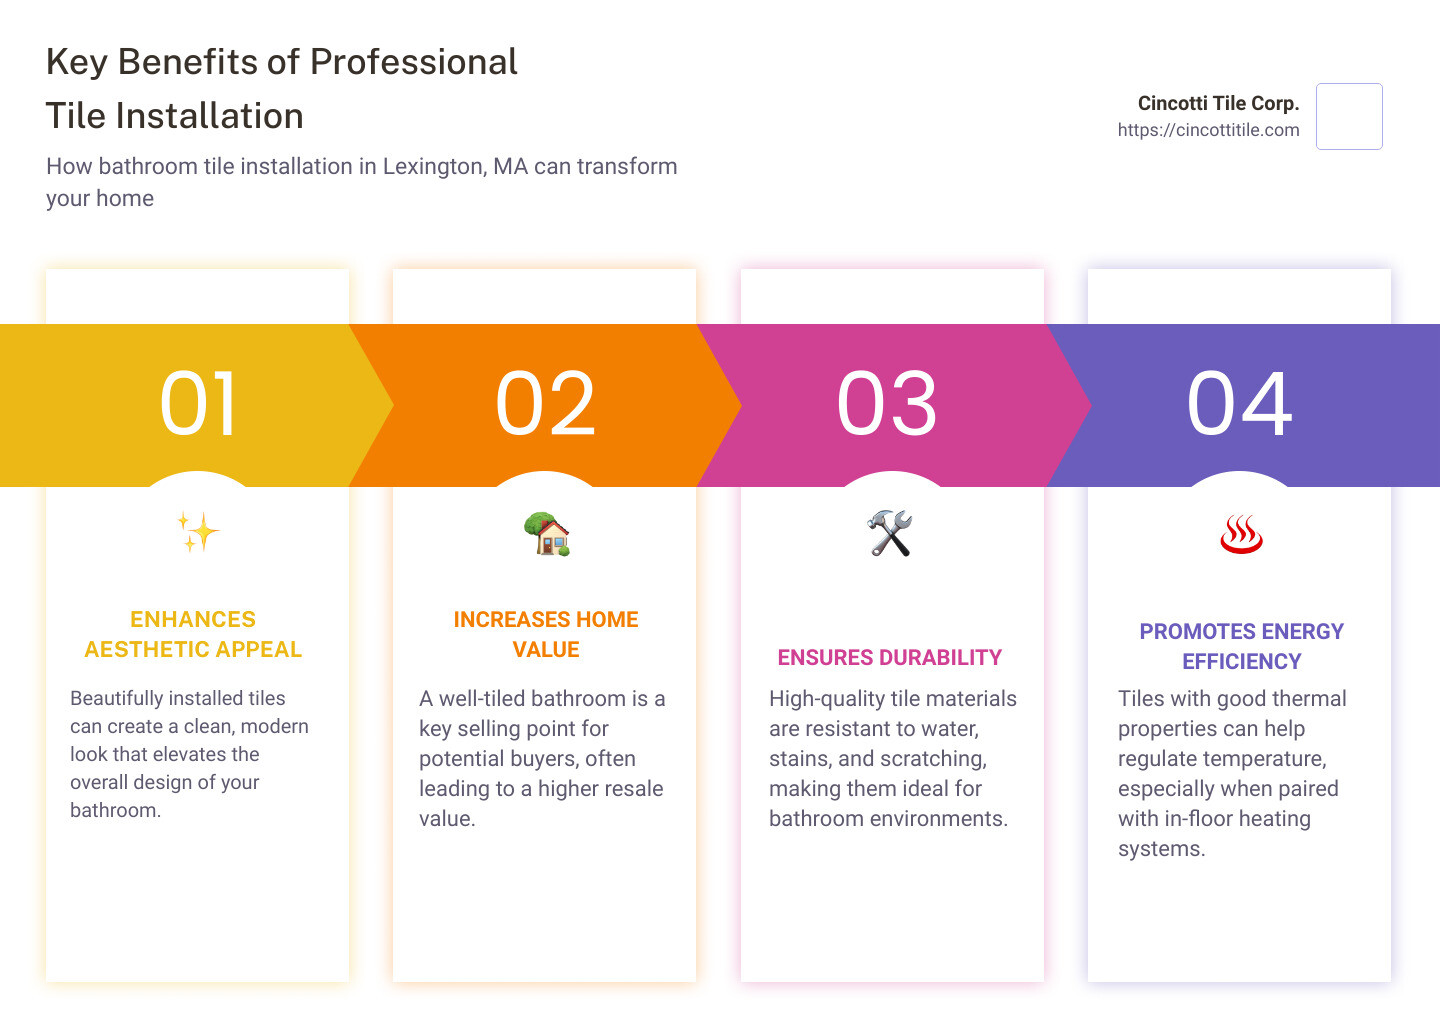
  • Improves Aesthetic Appeal: Beautifully installed tiles can create a clean, modern look that lifts the overall design of your bathroom.
  • Increases Home Value: A well-tiled bathroom is a key selling point for potential buyers, often leading to a higher resale value.
  • Ensures Durability: High-quality tile materials are resistant to water, stains, and scratching, making them ideal for bathroom environments.
  • Promotes Energy Efficiency: Tiles with good thermal properties can help regulate temperature, especially when paired with in-floor heating systems.

Lift your home with skilled tile installation from Cincotti Tile Corp. Our expert team ensures that your bathroom becomes a stylish and practical haven.

Key Benefits of Professional Tile Installation - bathroom tile installation lexington ma infographic pillar-4-steps

Understanding Tile Options

Choosing the right tile for your bathroom can be overwhelming due to the variety of options available. Here’s a simple guide to help you understand the most popular types of tiles and their benefits.

Ceramic Tile

Ceramic tiles are a popular choice for bathroom tile installation in Lexington, MA due to their versatility and affordability. They are made from clay and baked at high temperatures.

Pros:

  • Durable: Resistant to scratches and stains.
  • Variety: Available in many colors, shapes, and finishes.
  • Affordable: Generally less expensive than other types of tiles.

Cons:

  • Porous: Can absorb water if not glazed, making it less ideal for very wet areas.

Glass Tile

Glass tiles are known for their shiny, reflective surface that can make a small bathroom appear larger.

Pros:

  • Aesthetic Appeal: Offers a sleek, modern look.
  • Water-Resistant: Excellent for wet areas like showers.

Cons:

  • Costly: Typically more expensive than ceramic or porcelain tiles.
  • Slippery: Can be slippery when wet, so it’s better for walls than floors.

Porcelain Tile

Porcelain tiles are a type of ceramic tile but are denser and more durable. They are ideal for both floors and walls.

Pros:

  • Durable: Highly resistant to wear and tear.
  • Water-Resistant: Less porous than ceramic tiles.
  • Versatile: Can mimic the look of natural stone or wood.

Cons:

  • Costly: More expensive than regular ceramic tiles.
  • Difficult to Cut: Requires special tools for cutting.

Marble Tile

Marble tiles bring a touch of luxury and elegance to any bathroom.

Pros:

  • Neat Appearance: Offers a timeless, classic look.
  • Unique Patterns: Each tile has unique veins and patterns.

Cons:

  • Expensive: One of the pricier options.
  • High Maintenance: Requires sealing and regular maintenance.

Granite Tile

Granite tiles are another natural stone option, known for their strength and durability.

Pros:

  • Durable: Highly resistant to scratches and stains.
  • Heat Resistant: Can withstand high temperatures.

Cons:

  • Costly: Generally more expensive than ceramic or porcelain tiles.
  • Heavy: Requires a strong subfloor for installation.

Mosaic Tile

Mosaic tiles are small tiles that are often used to create intricate designs and patterns.

Pros:

  • Versatile: Can be used to create custom designs.
  • Aesthetic Appeal: Adds a unique, artistic touch to your bathroom.

Cons:

  • Time-Consuming: Installation can be labor-intensive.
  • Costly: Due to the detailed installation process.

Choosing the right type of tile is crucial for a successful bathroom remodel. Each tile type offers unique benefits, so consider your budget, style preferences, and maintenance requirements when making your decision. For expert guidance and professional installation, trust the team at Cincotti Tile Corp.

Preparing Your Bathroom for Tile Installation

Before you start your bathroom tile installation in Lexington, MA, proper preparation is key. This section will guide you through the necessary steps, materials needed, and safety tips to ensure a smooth and successful project.

Preparation Steps

  1. Clear the Area: Remove all items from the bathroom, including rugs, toiletries, and decorations. If you’re remodeling, you’ll need to remove old tiles or any existing flooring.

  2. Inspect the Surface: Ensure the surface where you plan to install the tile is clean, dry, and level. Uneven surfaces can cause tiles to crack or pop up over time.

  3. Measure the Area: Measure the dimensions of the area to be tiled. This will help you estimate the amount of tile and materials needed.

  4. Create a Layout: Plan your tile layout before you start. This helps to visualize the final look and allows you to make adjustments before permanently setting the tiles.

  5. Gather Tools and Materials: Have all the necessary tools and materials on hand. This includes a tile cutter, spacers, level, trowel, and more.

Materials Needed

To complete your bathroom tile installation, you’ll need the following materials:

  • Tiles: Buy 10% extra to account for cuts and breakages.
  • Thinset (Adhesive): Used to bond the tiles to the surface.
  • Grout: Fills the gaps between tiles and adds stability.
  • Caulk: Seals edges and prevents water from seeping behind tiles.
  • Sealer: Necessary for stone tiles to protect them from moisture.

Tile Materials List - bathroom tile installation lexington ma

Safety Tips

  1. Wear Protective Gear: Always wear safety glasses, gloves, and knee pads to protect yourself from sharp edges and heavy materials.

  2. Ventilate the Area: Ensure proper ventilation when working with adhesives and sealants to avoid inhaling fumes.

  3. Handle Tools Carefully: Use tools like tile cutters and saws with caution. Follow the manufacturer’s instructions to avoid accidents.

  4. Check for Hazards: If removing old tiles, be cautious of mold or asbestos. If in doubt, consult a professional.

By following these preparation steps, gathering the right materials, and adhering to safety tips, you’ll set the stage for a successful bathroom tile installation. For more detailed guidance and professional assistance, contact Cincotti Tile Corp.

Next, we’ll walk you through the Step-by-Step Guide to Bathroom Tile Installation.

Step-by-Step Guide to Bathroom Tile Installation

Now that you’ve prepared your bathroom, it’s time to dive into the step-by-step guide for bathroom tile installation. Follow these steps to transform your space with beautiful, durable tiles.

Planning

1. Choose Your Tile: Select the type of tile that suits your style and needs. Options include ceramic, porcelain, glass, marble, and granite.

2. Calculate Materials: Measure your bathroom’s dimensions and calculate the number of tiles needed. Remember to buy 10% extra to account for cuts and breakages.

3. Design Layout: Plan your tile layout. Use a chalk line to mark a grid on the floor or wall. This helps ensure a symmetrical and aesthetically pleasing design.

Measuring and Cutting

1. Measure Tiles: Measure and mark the tiles that need to be cut to fit around edges, corners, and fixtures.

2. Cut Tiles: Use a tile cutter or wet saw to cut the tiles to size. Always wear safety goggles and gloves when cutting tiles to protect yourself from sharp edges and debris.

Laying Tile

1. Apply Thinset: Spread thinset adhesive on a small section of the surface using a notched trowel. Work in small areas to prevent the adhesive from drying out.

2. Place Tiles: Lay the tiles onto the adhesive, pressing firmly. Use tile spacers to ensure even spacing between tiles.

3. Level Tiles: Check that the tiles are level using a spirit level. Adjust as needed before the adhesive sets.

Grouting

1. Mix Grout: Prepare the grout according to the manufacturer’s instructions. It should have a smooth, peanut butter-like consistency.

2. Apply Grout: Spread the grout over the tiles using a rubber float. Work diagonally to press the grout into the joints.

3. Clean Excess Grout: Wipe off excess grout from the tile surface with a damp sponge. Rinse the sponge frequently to keep it clean.

Sealing

1. Allow Grout to Cure: Let the grout cure for the recommended time, usually 24 hours.

2. Apply Sealer: If you’re using stone tiles, apply a sealer to protect them from moisture. Follow the manufacturer’s instructions for application.

3. Caulk Edges: Apply caulk around the edges of the tiled area, such as where the tiles meet the tub or walls, to create a watertight seal.

By following these steps, you’ll achieve a professional-looking bathroom tile installation that improves both the beauty and functionality of your space. For expert assistance and personalized service, contact Cincotti Tile Corp.

Next, we’ll discuss the Cost of Bathroom Tile Installation in Lexington, MA.

Cost of Bathroom Tile Installation in Lexington, MA

When considering bathroom tile installation in Lexington, MA, understanding the costs involved helps you plan your budget effectively. Here’s a breakdown of what you can expect.

Average Cost

The cost of bathroom tile installation varies widely. On average, homeowners in Lexington can expect to pay between $1,000 and $3,000 for a standard bathroom. This includes labor and materials but can fluctuate based on several factors.

Factors Affecting Cost

  1. Type of Tile: The material you choose significantly impacts the price. For example:

    • Ceramic tiles: $1 – $15 per square foot
    • Porcelain tiles: $3 – $20 per square foot
    • Marble tiles: $5 – $50 per square foot
  2. Bathroom Size: Larger bathrooms require more materials and labor, increasing the overall cost.

  3. Complexity of Design: Intricate patterns and custom designs take more time and skill, resulting in higher labor costs.

  4. Preparation Work: If your bathroom needs significant prep work, such as removing old tiles or repairing the subfloor, this will add to the cost.

  5. Labor Rates: Labor costs can vary based on the contractor’s experience and reputation. In Lexington, expect to pay between $50 and $150 per hour for professional tile installation.

Budget Tips

  1. Plan Ahead: Measure your bathroom and calculate the number of tiles needed. Always buy 10% extra to account for cuts and breakages.

  2. Choose Affordable Tiles: Opt for high-quality yet affordable tiles like ceramic or porcelain. These offer durability without breaking the bank.

  3. DIY Preparation: Save on labor costs by doing some of the prep work yourself, such as removing old tiles or cleaning the surface.

  4. Get Multiple Quotes: Contact several contractors to get quotes and compare prices. Ensure the quotes include all aspects of the job, from preparation to finishing touches.

  5. Negotiate: Don’t be afraid to negotiate with contractors. Some may offer discounts for larger projects or off-peak season work.

By understanding these costs and factors, you can budget effectively for your bathroom tile installation in Lexington, MA. For precise estimates and expert guidance, contact Cincotti Tile Corp.

Next, we’ll answer some Frequently Asked Questions about Bathroom Tile Installation.

Frequently Asked Questions about Bathroom Tile Installation

How much should I charge to install bathroom tile?

The cost to install bathroom tile can vary based on several factors. On average, you can expect to charge between $5 to $15 per square foot for labor alone. This rate can fluctuate depending on the complexity of the installation, the type of tile, and the region.

Material costs are separate and can range widely:

  • Ceramic tiles: $1 – $15 per square foot
  • Porcelain tiles: $3 – $20 per square foot
  • Marble tiles: $5 – $50 per square foot

For instance, if you’re installing ceramic tiles in a 100-square-foot bathroom, you might charge around $500 to $1,500 for labor, plus the cost of materials.

How much does it cost to tile a standard bathroom?

The total cost to tile a standard bathroom in Lexington, MA, usually falls between $1,000 and $3,000. This estimate includes both labor and materials but can vary based on several factors:

  • Bathroom Size: Smaller bathrooms will generally cost less, while larger bathrooms will require more tiles and labor.
  • Material Choices: More expensive tiles like marble or custom mosaics will drive up the cost.
  • Design Complexity: Simple, straight patterns are less labor-intensive than intricate designs.
  • Preparation Work: Additional costs may incur if old tiles need to be removed or the subfloor needs repair.

How long does it take to tile a bathroom?

The time required to tile a bathroom depends on several factors, including the size of the bathroom, the complexity of the design, and the type of tile used. On average:

  • Small Bathrooms (50-70 sq. ft.): 2-3 days
  • Standard Bathrooms (100-150 sq. ft.): 3-5 days
  • Large Bathrooms (200+ sq. ft.): 5-7 days

Factors Affecting Duration:

  1. Preparation Work: Removing old tiles and preparing the surface can add a day or two.
  2. Tile Type: Larger tiles cover more area quickly, while smaller tiles or mosaics take longer to install.
  3. Design Complexity: Intricate patterns and custom designs require more time and precision.
  4. Grouting and Sealing: These steps add additional time but are crucial for a durable and finished look.

Tips for Efficiency:

  • Plan Ahead: Have all materials and tools ready before starting.
  • Measure Twice, Cut Once: Accurate measurements reduce errors and save time.
  • Hire Professionals: Experienced installers can complete the job faster and with better results.

For more detailed guidance and expert help, contact Cincotti Tile Corp. They offer precise estimates and professional tile installation services custom to your needs.

Cost and Time Efficiency - bathroom tile installation lexington ma infographic 4<em>facts</em>emoji_light-gradient

Next, we’ll conclude with a summary of the key points and provide contact information for Cincotti Tile Corp.

Conclusion

In summary, bathroom tile installation can transform your space, adding both beauty and value to your home. Whether you’re using ceramic, porcelain, marble, or granite tiles, the process involves careful planning, precise measurements, and skilled craftsmanship. Costs can vary depending on the type of tile, the complexity of the design, and the size of your bathroom. On average, you can expect to spend between $1,000 and $3,000 for a standard bathroom in Lexington, MA, with labor costs ranging from $5 to $15 per square foot.

At Cincotti Tile Corp, we bring over 20 years of experience, exceptional craftsmanship, and competitive pricing to every project. Our team is dedicated to delivering the tile design you envision, ensuring clear and constant communication throughout the installation process. We specialize in all types of custom tile installations, including bathroom floor tiles, wall tiles, and custom shower elements.

For a free in-home consultation and custom tile design, contact us today. Let us help you transform your bathroom with our expert tile installation services.

For more information on our services in Lexington, MA, visit our Tile Installation Lexington, MA service page.

By choosing Cincotti Tile Corp, you’re opting for quality, reliability, and a seamless tile installation experience. We look forward to helping you achieve your dream bathroom.

From Budget to Luxury: The Cost of Bathroom Tile Per Square Foot

When you’re planning a bathroom renovation, one of the most crucial decisions you’ll make is selecting the right tiles. The cost of bathroom tiles per square foot can vary significantly, depending on the type of tile, its quality, and other factors. Knowing the average cost of bathroom tile per square foot can help you set a realistic budget and choose the best materials for your space.

Here’s a quick breakdown to give you an idea of what you might spend:

  • Ceramic Tiles: $1.25 to $30 per square foot
  • Porcelain Tiles: $3 to $30 per square foot
  • Natural Stone: $3 to $200 per square foot
  • Glass Tiles: $12 to $26 per square foot

Understanding these costs can make the process less overwhelming and more manageable.

We’ll explore the various options available, their price ranges, and factors that influence tile costs. By the end, you’ll have the information you need to make an informed decision for your bathroom renovation.

Cost breakdown of bathroom tiles - average cost of bathroom tile per square foot infographic infographic-line-5-steps-colors

Understanding the Average Cost of Bathroom Tile Per Square Foot

When you’re planning a bathroom renovation, one of the most crucial decisions you’ll make is selecting the right tiles. The cost of bathroom tiles per square foot can vary significantly, depending on the type of tile, its quality, and other factors. Knowing the average cost of bathroom tile per square foot can help you set a realistic budget and choose the best materials for your space.

Here’s a quick breakdown to give you an idea of what you might spend:

  • Ceramic Tiles: $1.25 to $30 per square foot
  • Porcelain Tiles: $3 to $30 per square foot
  • Natural Stone: $3 to $200 per square foot
  • Glass Tiles: $12 to $26 per square foot

Understanding these costs can make the process less overwhelming and more manageable.

We’ll explore the various options available, their price ranges, and factors that influence tile costs. By the end, you’ll have the information you need to make an informed decision for your bathroom renovation.

Types of Bathroom Tiles and Their Costs

Ceramic Tiles: These are a popular choice due to their affordability and durability. Prices range from $1.25 to $30 per square foot, making them a versatile option for any budget.

Porcelain Tiles: Known for being denser and more stain-resistant than ceramic, porcelain tiles cost between $3 and $30 per square foot. They are ideal for high-traffic areas and come in a variety of styles.

Natural Stone Tiles: These include options like travertine, slate, and granite. Prices vary widely, from $3 to $200 per square foot, depending on the type and quality of the stone. Natural stone adds a luxurious touch but requires more maintenance.

Glass Tiles: These tiles offer a sleek, modern look and are often used for accent walls or decorative borders. They range from $12 to $26 per square foot.

Vinyl Tiles: For those on a tight budget, vinyl tiles are a great option. They are easy to install and cost between $1 and $3 per square foot.

Marble Tiles: Known for their luxurious appearance, marble tiles can cost anywhere from $10 to $350 per square foot. They are often used in high-end bathroom designs.

Wood-Look Tiles: These are ceramic or porcelain tiles designed to mimic the appearance of wood. They range from $3 to $30 per square foot and offer the aesthetic appeal of wood without the maintenance issues.

Factors Influencing Tile Costs

Tile Size and Shape: Larger tiles may cost more per square foot but can reduce installation time and labor costs. Irregular shapes or custom designs can also increase the price.

Tile Hardness and Porosity: The more durable and waterproof a tile is, the higher its cost. For example, porcelain tiles are more expensive than ceramic due to their density and water resistance.

Old Floor Removal: If you need to remove existing tiles, this will add to your overall cost. Removal can cost between $2 and $7 per square foot.

Floor Design: Complex patterns like herringbone or mosaic designs require more labor and precision, increasing installation costs.

Installer Abilities: The skill level of your installer can affect labor costs. Highly experienced professionals may charge more but can ensure a high-quality finish.

Geographic Location: Labor and material costs can vary depending on where you live. Urban areas may have higher costs compared to rural locations.

Preparation Work: Additional work like subfloor repair or backer board installation can add to your total cost. These preparations are essential for ensuring the longevity of your tile installation.

By understanding these factors, you can better estimate the average cost of bathroom tile per square foot and make informed decisions that fit your budget and design preferences.

Next, we’ll dive into a detailed cost breakdown by tile type, helping you further understand what you can expect to pay for each option.

Detailed Cost Breakdown by Tile Type

Ceramic Tiles

Ceramic tiles are a popular choice for bathroom renovations due to their affordability and durability. They come in various colors, sizes, and designs, making them versatile for any aesthetic. The cost of ceramic tiles ranges from $1.25 to $30 per square foot. This wide range is because of the variety of styles available, from basic tiles to high-end designer options.

Porcelain Tiles

Porcelain tiles are denser and more stain-resistant than ceramic tiles, making them a durable option for high-traffic areas like bathrooms. They can mimic the look of natural stone or wood, providing a luxurious feel without the high maintenance. The cost for porcelain tiles typically falls between $3 to $30 per square foot.

Natural Stone Tiles

Natural stone tiles, such as travertine, slate, and granite, add a touch of luxury and elegance to any bathroom. These tiles are known for their durability and unique, natural patterns. However, they require more maintenance to keep their appearance. Prices for natural stone tiles vary widely, from $3 to $200 per square foot, depending on the type and quality of the stone:

  • Travertine: $3 to $20 per square foot
  • Slate: $8 to $20 per square foot
  • Granite: $5 to $200 per square foot

Glass Tiles

Glass tiles are often used for accent walls or decorative borders, adding a modern and sleek look to bathrooms. They come in various colors and shapes, making them a versatile choice for creative designs. The cost for glass tiles ranges from $12 to $26 per square foot.

Vinyl Tiles

For those on a tight budget, vinyl tiles offer an economical and easy-to-install option. They are waterproof and come in a variety of prints and colors that can mimic more expensive materials like stone or wood. Vinyl tiles cost between $1 to $5 per square foot.

Marble Tiles

Marble tiles are synonymous with luxury and elegance. They are often used in high-end bathroom designs due to their distinctive veining and rich color variations. However, marble requires regular maintenance to preserve its appearance. The cost of marble tiles can range from $10 to $350 per square foot, depending on the quality and style.

Wood-Look Tiles

Wood-look tiles are ceramic or porcelain tiles designed to mimic the appearance of wood. They offer the aesthetic appeal of wood without the maintenance issues, making them a practical choice for bathrooms. These tiles range from $3 to $30 per square foot.

Rectified Tiles

Rectified tiles are ceramic or porcelain tiles that have been precisely cut to ensure uniformity in size. This allows for minimal grout lines, creating a sleek and seamless look. The cost for rectified tiles can be higher due to the precision manufacturing process, typically ranging from $5 to $40 per square foot.

Next, we’ll explore the labor costs associated with bathroom tile installation, including factors that can influence these costs and how they compare to other flooring types.

Labor Costs for Bathroom Tile Installation

Average Labor Cost Per Square Foot

Labor costs are a significant part of the total expense when tiling a bathroom. On average, the labor cost for installing bathroom tiles ranges from $10 to $18 per square foot. This is higher than other flooring types like laminate, primarily due to the detailed work required in bathroom spaces.

Labor Cost Breakdown - average cost of bathroom tile per square foot infographic 4_facts_emoji_blue

Factors that can influence the cost include:

  • Tile Size: Larger tiles are quicker to install, reducing labor costs. Smaller tiles require more precise cuts and placement, increasing labor time.
  • Tile Hardness: Harder tiles like porcelain and natural stone take longer to cut, which can drive up labor costs.
  • Complexity of Project: Intricate patterns or multiple tile sizes can increase the time and skill required, leading to higher labor charges.
  • Geographic Location: Labor rates vary by region. Urban areas or locations with a high cost of living typically have higher labor rates.

Preparation and Additional Costs

Beyond the basic installation, several preparation and additional costs can affect your budget:

  • Subfloor Repair: If the subfloor is damaged or uneven, it must be repaired or leveled before tile installation. This can cost between $5 to $7.50 per square foot.
  • Backer Board Installation: A backer board provides a stable base for the tiles. Installing a backer board can cost $3.50 to $5.50 per square foot.
  • Mortar and Grout: Essential for securing tiles and filling gaps, the cost of mortar and grout is usually included in the labor charges but can vary based on the materials used.
  • Debris Disposal: Removing old flooring and disposing of debris can add to the cost. Expect to pay around $1.00 to $3.50 per square foot for removal and disposal.

Debris Disposal Costs - average cost of bathroom tile per square foot

When comparing these costs with other flooring types, tiling a bathroom is generally more expensive due to the labor-intensive nature of the work and the intricate details involved.

Next, we’ll explore cost estimates for different bathroom sizes, helping you understand what to expect based on the size of your project.

Cost Estimates for Different Bathroom Sizes

When planning a bathroom renovation, understanding the cost based on bathroom size is crucial. Here’s a breakdown for small, medium, large, and extra large bathrooms.

Small Bathrooms (40 sq. ft.)

For a small bathroom, you can expect the total cost to range from $560 to $1,500. This estimate includes both materials and labor.

  • Ceramic tiles: Affordable and versatile, costing $1.25 to $30 per square foot.
  • Porcelain tiles: Durable and stain-resistant, costing $3 to $30 per square foot.
  • Natural stone tiles (like travertine and slate): Luxurious but pricier, ranging from $3 to $200 per square foot.

Medium Bathrooms (80 sq. ft.)

A medium-sized bathroom will have a total cost ranging from $1,040 to $3,000.

  • Ceramic tiles: Remain a budget-friendly option.
  • Porcelain tiles: Offer a good balance of durability and style.
  • Natural stone tiles: Add a touch of luxury and durability.

Large Bathrooms (140 sq. ft.)

For large bathrooms, the total cost starts at $1,650 and up, depending on the materials chosen.

  • Ceramic tiles: Continue to be a cost-effective choice.
  • Porcelain tiles: Suitable for high-traffic areas due to their durability.
  • Natural stone tiles: Make a statement with their unique patterns and textures.

Extra Large Bathrooms (200 sq. ft.)

For extra large bathrooms, expect the total cost to begin at $2,200 and up.

  • Ceramic tiles: Offer extensive design options.
  • Porcelain tiles: Provide long-lasting performance.
  • Natural stone tiles: Lift the bathroom’s aesthetic with their natural beauty.

Next, we’ll dive into the pros and cons of DIY versus hiring a professional for your bathroom tile installation.

DIY vs. Hiring a Professional

When it comes to bathroom tile installation, you have two main options: doing it yourself (DIY) or hiring a professional. Each approach has its own pros and cons, and understanding these can help you make an informed decision.

DIY Installation Costs

Pros:

  • Cost Savings: You can save on labor costs, which can be significant.
  • Flexibility: Work at your own pace and schedule.
  • Satisfaction: Completing a project yourself can be rewarding.

Cons:

  • Time-Consuming: Installing tiles can take a lot of time, especially if you’re inexperienced. Expect to spend 10 hours or longer on a small bathroom.
  • Tools and Materials: You’ll need to buy or rent various tools, which can add up. For a 5-by-8 bathroom, expect to spend around $250 on tools and supplies.
  • Potential Mistakes: Errors can be costly to fix and may affect the quality of the finish.

Tools and Materials Needed:

  • Subflooring: $120 to $200
  • Floor underlayment: $40 to $80
  • Cement board: $20 to $40
  • Thin-set mortar: $15
  • Tile scraper: $10 to $60
  • Tile cutter: $10
  • Tile nippers: $15

Professional Installation Costs

Pros:

  • Expertise: Professionals bring experience and skills, ensuring a high-quality finish.
  • Efficiency: A professional can complete the job faster, typically in 6 to 8 hours for a small bathroom.
  • Less Stress: Hiring a pro means less hassle for you.

Cons:

  • Cost: Hiring a professional costs between $100 and $150 per hour. For simple projects, expect to pay $2 to $7 per square foot, and $8 to $13 per square foot if old flooring needs to be removed.
  • Scheduling: You’ll need to coordinate with the installer’s availability.

Quality of Finish:

  • High-Quality Finish: Professionals ensure precision and durability, reducing the risk of future issues.
  • Design Expertise: They can offer creative solutions and patterns that you might not have considered.

Cost Comparison

Aspect DIY Professional
Initial Cost Lower (around $250 for tools) Higher ($100-$150 per hour)
Time Investment 1-2 days 6-8 hours
Quality of Finish Variable High
Potential Mistakes Higher risk Lower risk

Choosing between DIY and hiring a professional depends on your budget, time, and confidence in your tiling skills. If you’re looking for a flawless finish and can afford the extra cost, hiring a professional is often worth it.

Next, we’ll answer some frequently asked questions about the average cost of bathroom tile per square foot.

Frequently Asked Questions about the Average Cost of Bathroom Tile Per Square Foot

How much should you spend on bathroom tiles?

The amount you should spend on bathroom tiles depends on your budget, the type of tiles you prefer, and the size of your bathroom. Here’s a quick breakdown:

  • Budget Options: For those on a tight budget, ceramic or vinyl tiles are great choices. They cost around $1.25 to $30 per square foot for ceramic and $1 to $3 per square foot for vinyl.

  • Mid-Range Options: If you have a bit more to spend, consider porcelain or travertine tiles. Porcelain tiles cost between $3 to $30 per square foot, while travertine ranges from $3 to $20 per square foot.

  • Luxury Options: For a high-end look, marble or granite tiles are ideal. Marble tiles can cost anywhere from $10 to $350 per square foot, and granite tiles range from $5 to $200 per square foot.

What is the average labor cost per square foot for tile?

Labor costs for tile installation can vary based on several factors, including the complexity of the project and regional differences. Here are some general guidelines:

  • National Average: The labor cost to install bathroom tiles typically ranges from $8 to $20 per square foot. This includes measuring, cutting, and laying the tiles, as well as grouting and cleanup.

  • Regional Variations: Labor costs can be higher in urban areas due to increased demand and living costs. For example, in cities like New York or San Francisco, you might pay closer to the higher end of the range.

How long does it take to tile a bathroom floor?

The time required to tile a bathroom floor depends on several factors, including the size of the bathroom, the type of tiles used, and the complexity of the design. Here’s a general timeline:

  • Preparation: This involves removing old tiles, repairing the subfloor, and installing backer boards. Preparation can take 1 to 2 days.

  • Installation: Laying the tiles typically takes 6 to 8 hours for a small bathroom. Larger or more complex projects might take 2 to 3 days.

  • Drying Time: After the tiles are installed, the grout needs time to dry. This usually takes 24 to 48 hours.

By understanding these timelines and costs, you can better plan your bathroom renovation project and set realistic expectations.

Next, we’ll explore cost estimates for different bathroom sizes, from small to extra large.

Conclusion

In summary, the average cost of bathroom tile per square foot varies widely based on the type of tile you choose and the complexity of your installation. From budget-friendly options like ceramic and vinyl to luxurious choices like marble and granite, there’s a tile for every budget and style.

Making informed decisions about your bathroom tile installation is crucial. Consider factors like material costs, labor expenses, and additional costs for preparation and cleanup. Understanding these elements will help you set a realistic budget and avoid unexpected expenses.

At Cincotti Tile Corp., we pride ourselves on providing exceptional craftsmanship and competitive pricing. With over 20 years of experience in residential tile installation and repair, we are dedicated to changing your bathroom into a beautiful and functional space.

Whether you’re looking for a simple upgrade or a complete bathroom makeover, our team of experts is here to help. We offer a wide range of tile materials, including ceramic, porcelain, marble, and granite, to suit your unique preferences and budget.

Ready to start your bathroom renovation? Contact Cincotti Tile Corp. today for a free consultation and detailed estimate. Let us help you create the bathroom of your dreams with our top-notch tile installation services.

By understanding the costs and options available, you can make informed decisions that ensure your bathroom tile project is a success. Trust Cincotti Tile Corp. for exceptional craftsmanship and competitive pricing. We look forward to working with you!